Blog

  • Is your fig tree stingy? Here’s the simple gesture that will finally make it ultra generous with fruits

    Is your fig tree stingy? Here’s the simple gesture that will finally make it ultra generous with fruits

    Every year, you dream of enjoying juicy figs freshly picked from your garden, but your fig tree isn’t cooperating. Small harvests, tiny fruits, and often a real disappointment despite all your efforts… What if the secret to a generous harvest lies precisely in the branch you need to cut?

    Indeed, according to many professionals, improper pruning significantly hinders a fig tree’s production. Identifying the problematic branch and making the right cut can make all the difference. Here’s how to triple your fig harvest through strategic pruning!

    Why your fig tree produces little

    Several reasons explain why your fig tree struggles to bear fruit properly.

    • First, the age of the tree plays a significant role: a young fig tree under three years old focuses all its energy on growth. In contrast, a mature tree should provide a generous harvest.
    • The weather also weighs heavily on the balance. Cold in spring or excessive humidity during the early flowering weeks can severely limit fig formation.
    • Finally, the quality of your soil is crucial. A fig tree thrives in well-drained, nutrient-rich, sunny soil. Wet or nutrient-poor ground stunts production !

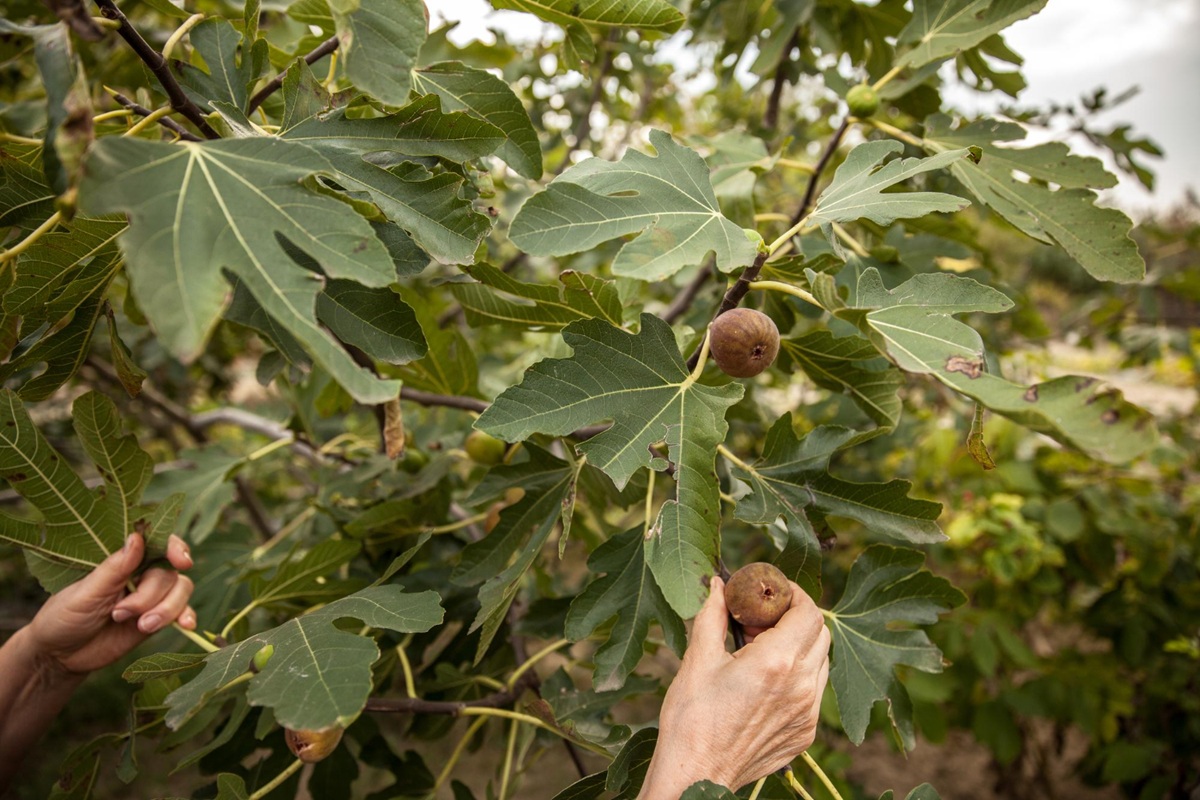
    The branch to remove first on your fig tree

    Did you know that your fig tree likely has one or more branches that waste its energy without providing real benefits? These are known as “greedy branches” or wood branches, and it’s best to identify and cut them to redirect your tree’s resources toward fruiting.

    These greedy branches can be easily spotted:

    • They grow vigorously upward, in a very vertical manner.
    • Their bark appears smoother than that of other branches.
    • They have large leaves but produce very few fruits, or none at all.

    One greedy branch can absorb up to 40% of your fig tree’s resources without ever bearing fruit. Cut it away to redirect this precious energy to branches that actually produce.

    Pruning your fig tree: the ideal time and steps

    So, when should you make this beneficial cut for your fig tree? You have two ideal time frames during the year:

    • As spring approaches (February-March), while the tree is still dormant, to prepare for new growth.
    • Or just after harvest, around late September or early October, to encourage quick healing before the cold sets in.

    Here’s how to prune effectively:

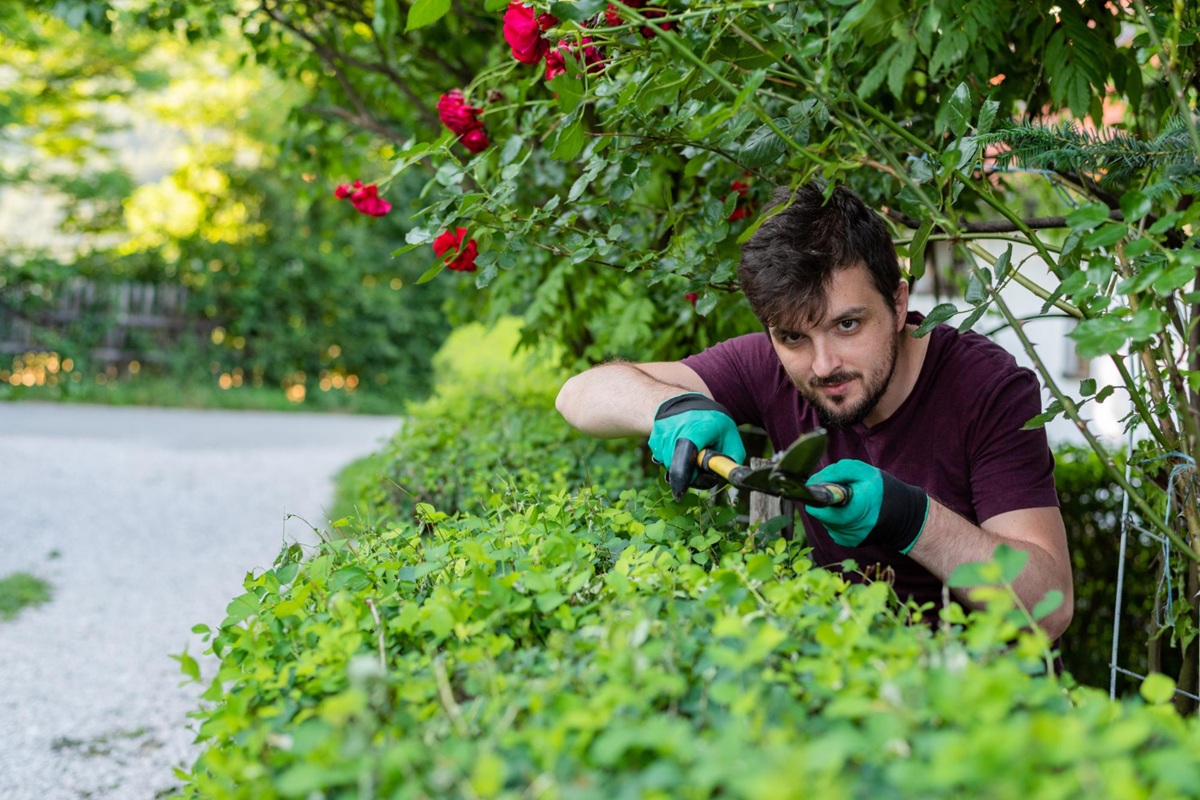
    Start by identifying the main greedy branch, the one that consumes the most unnecessary energy.

    Using a sharp and clean pruning shear, cut it at the level of the supporting branch, cleanly and precisely. For a significant cut, remember to apply healing paste to protect against potential infections.

    Common mistakes when pruning a fig tree

    Avoid the following mistakes at all costs:

    • Never cut all the greedy branches at once; instead, opt for gradual pruning over several seasons.
    • Always preserve the horizontal branches: they typically bear a lot of fruit.
    • Always remember to disinfect your tools (diluted bleach or rubbing alcohol) before each cut to prevent diseases.

    Better harvest: more figs and more flavor

    The benefits of proper pruning become evident as early as the following season: figs become more numerous, larger, and significantly sweeter! In fact, intelligent pruning improves air circulation, thereby reducing the risk of diseases.

    Recent tests have shown that selective pruning can increase the sugar content of figs by nearly 15%. Some gardeners even claim their production tripled after just a few years.

    Ideal care after pruning your fig tree

    After carrying out this beneficial pruning, support your fig tree for optimal growth:

    In the following months, apply a nutrient-rich mulch at the base of the tree to retain moisture and strengthen its root system.

    A top dressing of well-matured compost in spring will provide the necessary nutrients while limiting the excessive growth of branches.

    Simple gestures for generous harvests

    You now understand that this small vertical greedy branch is literally stealing your fig harvest!

    By applying these tailored pruning and care tips, your fig tree will finally thrive and will quickly reward you with a bountiful and tastier fruit yield.

    So, what are you waiting for to bring a smile back to your tree? Grab your pruning shears and treat your taste buds!


    Have you noticed an improvement in your fig tree’s production after specific pruning? Did you encounter any difficulties while pruning your tree? Share your experience or ask your questions! We look forward to your feedback in the comments below, we value your opinion!

  • Is your pool liner dirty or yellowed? This simple and effective method makes it look like new

    Is your pool liner dirty or yellowed? This simple and effective method makes it look like new

    You’ve invested in a beautiful pool with an immaculate liner. Did you know that maintaining it is essential to prolong the lifespan of your pool? A clean liner not only ensures the watertightness of the basin but also enhances the overall aesthetics of your swimming space.

    So how do you effectively clean your pool liner? Here are some simple tips to implement regularly.

    Why Regular Cleaning of Your Liner Is Essential?

    It’s tempting to postpone liner maintenance, especially when stains seem minimal at first. But did you know that neglecting regular cleaning can rapidly deteriorate the liner? Irreversible damage can occur, leading to costly tears or leaks.

    Think about your comfort and that of your loved ones. A poorly maintained pool quickly becomes uncomfortable and unsuitable for swimming, with cloudy water that is difficult to chemically balance. The solution? An effective and regular cleaning routine for the liner.

    Identifying Common Stains on the Liner

    Not all stains are the same, and each will require a specific treatment. Have you spotted any of these stains on your liner?

    • Whitish or grayish stains: These are often due to water scale. Opt for a suitable anti-scale product, apply it according to the manufacturer’s instructions, and use a soft brush to remove the marks.
    • Brown or green stains from algae: Prepare a solution of diluted chlorine in water. Spread this mixture evenly in your pool and gently scrub using an appropriate brush. If the stain persists, a high-pressure cleaner may ease the task.
    • Visible rust marks: These usually result from contact with a metal object such as a ladder or lamp. In this case, localized application of a rust remover will be necessary. Carefully follow the manufacturer’s recommendations.

    How to Proceed Step by Step with Cleaning Your Liner?

    For optimal results, here are the simple and effective steps to follow:

    • Always start by removing debris present on the surface and at the bottom of the pool using suitable skimmers.
    • Next, prepare a cleaning solution: either a specific liner product or a more natural solution like a mixture of white vinegar and water (half and half) or well-diluted soda crystals. Avoid using strong or abrasive chemicals that could damage the liner.
    • Using your wall brush, apply this solution while gently scrubbing from bottom to top in circular motions. Pay special attention to dirtier areas or those affected by algae.
    • Don’t forget to clean the bottom of the pool cautiously, respecting the fragility of the liner.
    • Finally, use a pool-specific vacuum to easily absorb the remaining dirt and make your pool water spotless.

    No vacuum available? Don’t worry, just start the filtration at the end of the cleaning, and the deposits will be naturally eliminated.

    Some Simple Recommendations to Durably Preserve Your Liner

    To prolong the integrity of the liner, adopting a few simple reflexes can make all the difference:

    • Regularly check the essential water parameters (pH, chlorine). Well-balanced water prevents the occurrence of unwanted stains.
    • Incorporate preventive treatments against algae or bothersome deposits using suitable clarifying or algicidal products in your maintenance routine.
    • During the cold season, strictly follow the winterizing recommendations for pools. A durable cover will protect your liner from weather damage or leaf deposits.

    Essential Points to Keep in Mind on Liner Maintenance

    If you were to remember only a few key points, here are the essentials to keep in mind:

    • The liner protects the watertightness and aesthetics of the basin, making regular maintenance essential.
    • Regular preventive cleaning prevents costly repairs and problems with difficult-to-manage and unsafe water.
    • Use gentle, suitable, or natural products, absolutely avoiding harsh chemicals.
    • Carefully follow the instructions provided by manufacturers for each product you use.

    Did you find these tips helpful for cleaning your liner? Do you have a favorite trick or product that you use to maintain your pool? Share your thoughts and methods with us in the comments below. And if you have any questions, feel free to ask; we are here to help!

  • The hole in the handle of pots is not just for hanging them: here is their lesser-known usefulness

    The hole in the handle of pots is not just for hanging them: here is their lesser-known usefulness


    The kitchen is full of small details that often go unnoticed. One of these is the hole in the handle of pans and pots. While many use it to hang their utensils, few know that it conceals a much more practical and lesser-known purpose. So, what is this second use? And how can you use it to improve your daily cooking experience?

    Let’s dive into the topic to understand everything…

    No, This Hole Is Not Just for Hanging Your Utensils!

    One might think that this little hole was designed exclusively for hanging pans and pots on a rack or hook in the kitchen. While it certainly is a handy option, it’s not its only purpose, nor the most ingenious.

    This hole was designed to make your life easier while cooking. In fact, the trick lies in how it can accommodate another essential kitchen accessory: wooden utensils!


    The Lesser-Known Trick to Keep Your Kitchen Clean and Hygienic

    Have you ever found yourself searching for a place to put your wooden spoon after stirring your dish, without dirtying your countertop? If so, you’ve likely encountered this dilemma: placing the spoon directly on the countertop, using a plate, or sometimes balancing it precariously on the edge of the pot.

    However, the hole in the handle of your pans and pots could be the solution to this problem. Here’s how to use it:

    • Insert the handle of your wooden spoon or spatula into the hole of the pan’s handle.
    • Position it so that the end of the utensil doesn’t touch the countertop but stays above the pot.

    In this way, you can stir your dishes without desperately searching for a clean place to set your tool down.

    Why Is This Trick So Useful in the Kitchen?


    1. Keep a Clean Countertop

    When preparing multiple dishes or during long cooking times, it’s essential to keep a well-organized countertop. By placing the utensil directly on the pan or pot, you avoid splatters or sauce residues that could dirty your surfaces. The result: less cleaning and more time to focus on cooking.


    2. Reduce the Risk of Contamination

    Placing a utensil on the countertop can lead to cross-contamination. Even if your kitchen is clean, particles or bacteria may be present and can end up on the spoon, and then into your food. By suspending the utensil over the pan, you eliminate this risk. This trick is particularly useful when handling raw foods like meat or fish.


    3. Keep Your Utensil Within Reach

    By inserting your spoon or spatula into the hole of the handle, you have it always nearby. This allows you to react quickly when needed: stir, taste, or adjust the cooking without losing time searching for where you placed the utensil.


    What Utensils Should You Use for This Trick?

    Not all kitchen utensils are suitable for this trick. Here are a few types that work particularly well:

    • Wooden spoons: perfect for mixing sauces or simmering dishes.
    • Wooden spatulas: ideal for flipping or gently stirring preparations.
    • Silicone spoons: these work well too, provided their handle is thin enough to fit through the hole.

    Avoid using overly heavy or bulky utensils that may unbalance the pot or pan.

    How to Properly Use This Trick Without Damaging Your Utensils?

    Although this technique is clever, it’s crucial to ensure you don’t damage your utensils or cookware. Here are a few simple recommendations to protect them:

    • Ensure the hole in the handle is wide enough for the chosen utensil. If the utensil doesn’t fit well, it may slip and fall.
    • Avoid using this trick with non-stick pots or pans, especially if the utensil is metal. This could scratch or damage the coating.
    • Position the utensil securely so that it doesn’t tip over during cooking.

    Other Lesser-Known Tips to Optimize Your Pans and Pots

    Beyond the hole in the handle, there are many other features or tips to maximize the use of your cooking utensils. Here are some examples:

    • Slightly curved edges on pans make it easier to pour sauces without spilling.
    • Temperature indicators on some handles indicate when the pan is ready for cooking.
    • Removable handles save space and simplify storage, especially in small spaces.

    A Detail That Makes All the Difference!

    The hole in the handle of your pans and pots is not there by accident. Although it is often used for hanging, its true use can transform your cooking experience, making it cleaner, more organized, and more hygienic. This simple yet ingenious trick demonstrates that even the smallest details can have a significant impact on our culinary lives. So, the next time you cook, remember to utilize this handy hole to keep your wooden utensil within reach.

    In this way, you’ll not only keep a spotless countertop but also ensure a healthier kitchen. A little trick to adopt without delay!


  • Do you grow tomatoes? This flower naturally protects them from diseases (and it’s gorgeous)

    Do you grow tomatoes? This flower naturally protects them from diseases (and it’s gorgeous)

    Why do so many gardeners plant marigolds alongside their tomatoes in May? You might think it’s for aesthetics, and indeed, these vibrantly colored flowers add a lovely ambiance to the vegetable garden.

    However, the reasons go far beyond just decorative appeal. Let’s explore together why and how to make the most of this astonishing plant pairing.

    Marigolds to protect your tomato plants

    You may not know this, but marigolds (known as Tagetes) have particularly effective properties against certain dreaded garden pests: nematodes.

    These tiny microscopic worms specifically target the roots of tomatoes, weakening them over time. With reduced yield and fragile plants, achieving a successful harvest by the end of the season can be quite challenging!

    The good news? Your marigolds will serve as a distraction. They naturally release volatile substances that repel these pests, completely disorienting them. Even better, the nematodes will be drawn directly to the roots of the marigolds, which are much less susceptible to attacks, thereby acting as a true barrier to safeguard your tomatoes.

    Enjoy the secondary benefits of marigolds

    But that’s not all! Marigolds also possess a second talent particularly valuable to the vegetable garden: enhancing biodiversity. Their generous blooming (from June to October) attracts bees and other essential pollinating insects to your garden.

    Moreover, these Tagetes also attract certain natural predators of pests. The result? Your vegetable garden gains ecological balance, enhancing its resilience against unwanted attacks.

    Practical tips for incorporating marigolds in your vegetable garden

    Find them a strategic place

    These little flowers are quite easy to incorporate. They are suitable for:

    • The borders of your vegetable garden (opt for dwarf varieties, such as Tagetes patula)
    • More ample flower beds (choose taller varieties like Tagetes erecta)
    • Pots for your balconies.

    Their moderate height (between 15 and 50 cm approximately) means they never directly compete with your tomato plants.

    Prefer spring planting

    The ideal time to plant your marigolds is between April and May. Wait until the risk of frost has passed. You can also start seeds as early as March, indoors, and then transplant the young plants outdoors once the weather stabilizes.

    Consider the planting distances

    Keep in mind a simple rule: your marigolds should be planted about 20 to 30 cm from your tomato plants. This spacing will allow each plant to fully benefit from the available space and nutrients in the soil.

    The ecological and historical benefits of a long-known pairing

    This practice isn’t new! Did you know that the pairing of tomatoes and marigolds perfectly aligns with the fundamental principles of permaculture? This agricultural approach is based on the harmonious collaboration between plant species, thereby limiting the use of chemical products.

    Another key point to remember is that this association has been widely used since the 19th century, not only to naturally protect gardens but also as both a decorative and useful element.

    Common mistakes to avoid with marigolds

    Of course, certain precautions are necessary to maximize their benefits:

    • Absolutely avoid planting them too close together, as this can compromise their effectiveness. Being too close limits the production of the repellent substances needed against nematodes.
    • Do not leave them to their own devices! To ensure a beautiful bloom all summer and optimal protection for your tomatoes, make sure they have well-draining soil and good sunlight exposure. Also, remember to provide them with regular water and compost.

    A smart gesture for healthy tomatoes

    By planting your marigolds near tomatoes starting in May, you are doing more than beautifying your garden. You are adopting an effective ecological solution against crawling pests while increasing your green space’s appeal to valuable pollinators.

    This winning combination ensures a bountiful harvest without harmful chemical products and in complete respect for your environment.


    And what about you? Have you ever tried the tomato-marigold combination in your vegetable garden? What are your favorite tips for successfully planting tomatoes? Share your experience with our gardening community! Feel free to leave your remarks or questions in the comments below.

  • Do you garden? Here are 5 ultra-common mistakes that sabotage all your hard work (and how to avoid them)

    Do you garden? Here are 5 ultra-common mistakes that sabotage all your hard work (and how to avoid them)

    Having a garden is a true joy! However, to enjoy it all year round, certain precautions must be taken, especially in spring. This pivotal season is the perfect time to gently awaken your garden, but common mistakes can quickly ruin all your efforts.

    What are the frequent errors made in spring, and how can they be avoided? Here are our practical tips for a flourishing garden.

    Error #1: Pruning Hedges and Shrubs Too Early

    When spring’s warm days return, it can be tempting to cut away all the dead branches! However, pruning shrubs and hedges too early in the season can significantly weaken your plants. Why? Simply put, cutting the new shoots will hinder the expected growth revival.

    Another important consideration is the ecological impact: the nesting period for birds begins around mid-March. Pruning too soon could destroy nests or expose them dangerously to predators.

    The solution? Wait patiently for the branches to develop properly before intervening. Your garden will be better for it!

    Error #2: Ignoring Potential Late Frosts

    The first rays of spring sunshine do not completely chase away the cold! The risk of frost can persist until mid-May, particularly around the well-known Saints de Glace.

    If you’ve already planted, protect your plants with a special anti-frost cover, readily available at garden centers, to avoid disaster with the slightest chill. Ideally, delay planting sensitive varieties until after May 15; this simple precaution can make all the difference.

    A little extra tip: keep an eye on the local weather to react quickly in case of frost alerts.

    Error #3: Neglecting Weeding and Mowing the Lawn Ineffectively

    If you’re planning to dust off your house in the spring, remember your garden also needs a thorough clean! By removing weeds early in the season, you create more space and resources for your favorite plants.

    When it comes to mowing, pay special attention:

    • Never mow a wet lawn.
    • Before starting your mower, always check that no hedgehog or other hidden residents are hiding in the tall grass.
    • Leave at least 5 to 7 centimeters of grass height after mowing to allow the lawn to breathe and promote its health.

    Finally, why not leave a wild, unmown patch? This friendly gesture will help protect biodiversity in your garden.

    Error #4: Using Fertilizers at the Wrong Time

    In spring, avoid excess fertilizer. Your plants have enough reserves accumulated from the autumn: too much fertilizer can even scorch their delicate leaves!

    Your fertilization will only be beneficial after flowering, particularly for spring-flowering shrubs. Choose a fertilizer that is well-suited and rich in essential nutrients.

    If you notice any burn marks from the fertilizer, rinse your plant generously with clear water and gently remove any excess product from the surface.

    Error #5: Misjudging the Planting Seasons

    Some gardeners think they can change the season, but plants do not change their habits! Be diligent and refer to a specific spring gardening calendar:

    • Stick to varieties that are suitable for the season; otherwise, all your efforts will be in vain.
    • Keep in mind that many beautiful flowers and shrubs must absolutely be planted in the autumn to take root well by the following spring.

    Your garden will thus be more vibrant, lively, and harmonious throughout the year.


    We’d love to hear your thoughts! Have you ever made any of these gardening mistakes when spring arrives? What are your personal tips for keeping your garden thriving during this delicate time? Feel free to share your experiences in the comments below! We love reading your input.

  • She withstands temperatures over 40°C: plant this forgotten herb in the spring (and enjoy it all summer).

    She withstands temperatures over 40°C: plant this forgotten herb in the spring (and enjoy it all summer).

    With increasingly common heat waves, selecting robust plants becomes essential for maintaining a lush garden.

    Are you familiar with hyssop? Less famous than its cousin thyme, this Mediterranean herb easily withstands intense heat and enhances your summer recipes. Let’s explore why it deserves a special place in both your garden and your kitchen.

    Hyssop: An Heat-Resistant Herb From The South

    Hyssopus officinalis, commonly known as hyssop, belongs to the same botanical family as the famous thyme, sage, and mint: the Lamiaceae. Native to Central Asia and the Mediterranean, this perennial plant naturally thrives in dry, limestone, and stony soils.

    Easily recognizable by its stems forming a beautiful bush that can reach 60 centimeters in height, hyssop sports small, slender, bright green leaves. In summer, its blue flowers irresistibly attract bees and butterflies to your garden.

    Interesting Varieties For Your Garden

    Here are a few interesting varieties to consider based on your preferences and space:

    • Hyssopus officinalis ‘Alba’ with beautiful white flowers
    • Hyssopus officinalis ‘Rosea’ featuring very elegant pink flowers
    • Hyssopus officinalis ‘Aristatus’ with a more compact foliage, perfect for small gardens
    • Hyssopus officinalis ‘Decumbens’ with a creeping habit, ideal as ground cover

    Why Hyssop Withstands Drought Very Well

    This plant conceals several natural secrets that make it a champion of high temperatures:

    Natural Anti-Drought Assets

    Equipped with deep roots that can reach water below the surface and small, leathery leaves coated with a thin protective wax, hyssop naturally retains moisture.

    Its adaptability is such that it can survive winters as cold as -15 °C and withstand summer temperatures exceeding 40 °C.

    Limited Care Assured Robustness

    Once planted, hyssop requires very little maintenance. A weekly watering is sufficient, even during the driest periods.

    And the good news is that too much moisture can actually cause root rot! This makes it the ideal plant to adopt in rocky or challenging areas.

    Easily Grow Hyssop In Your Garden Or On Your Balcony

    Are you new to gardening? No worries with hyssop; it grows easily, whether in soil or in a pot.

    Optimal Conditions To Succeed In Growing It:

    • Full sun: provide at least 6 hours a day
    • Well-drained soil, even low in nutrients
    • Neutral to slightly alkaline pH (6.5 to 8)
    • At least 40 to 50 cm between each plant

    Planting And Propagating Your Hyssop

    You can plant your seedlings in spring or autumn. To propagate your plant, it’s quite simple:

    • Sow in seed trays in spring, then transplant as soon as the seedlings reach 10 cm
    • Simply divide the clumps every three to four years in spring
    • Take semi-woody cuttings in summer in a soil-sand mix

    Pot Culture: Some Practical Tips

    On a balcony, choose a deep pot (at least 30 cm), well-drained with a soil-sand-pozzolana mix.

    Monitor watering a bit more often without keeping the substrate too moist. A mineral mulch will effectively reduce evaporation.

    Hyssop: A Strong Flavor For Elevated Summer Dishes

    Have you ever cooked with this lesser-known herb? Its complex flavor, both camphor-like and mentholated with subtle floral notes reminiscent of lavender, brings freshness and surprise to all your summer dishes.

    Here are a few delicious ways to use hyssop leaves and flowers:

    • Chilled infusion with lemon and a few fresh leaves
    • In your summer salads of tomatoes or cucumbers
    • With grilled vegetables, marinades, or yogurt sauces

    Want to try an easy recipe? Here’s a refreshing idea:

    Summer Lemonade With Hyssop

    • 1 liter of water, 3 organic lemons, a few sprigs of hyssop
    • 80 g of sugar or honey, ice cubes

    Prepare a hot infusion with the hyssop, then strain the mixture. Add freshly squeezed lemon juice and sugar. Serve chilled with ice cubes and garnish with a sprig of hyssop.

    Interesting Traditional Medicinal Uses But Worth Knowing About

    This herb has long been used to combat coughs, aiding digestion or alleviating rheumatic pains.

    However, caution: its concentrated essential oil can be potentially neurotoxic in high doses. In small amounts, fresh leaves are completely safe.

    Combine Hyssop With Other Plants For A Harmonious Garden

    Take advantage of it by pairing it usefully:

    • With your roses or cabbages to deter aphids and cabbage butterflies
    • Alongside thyme, sage, or rosemary in aromatic borders

    In cooking, feel free to pair it with citrus fruits, red berries, or Mediterranean vegetables like zucchini or eggplant. Guaranteed effect!

    Where To Find Hyssop Easily For Growing Or Cooking?

    To find seeds or plants, focus on specialized nurseries, plant fairs, or exchanges among gardeners.

    For fresh or dried hyssop for cooking, head to your organic market, herbalist, or local productive networks.


    So, did you already know about hyssop before reading this article? Do you use it in your garden or kitchen? What are your favorite dishes with this lesser-known herb? Share your tips and opinions in the comments!

  • Tiger mosquito: the mistakes to avoid at all costs if you don’t want them to invade you

    Tiger mosquito: the mistakes to avoid at all costs if you don’t want them to invade you

    The tiger mosquito (Aedes albopictus) is a particularly troublesome insect, known for ruining summer days with its painful bites. But did you know that it can also transmit potentially serious diseases such as dengue, Zika, and chikungunya?

    Learning more about this mosquito is a first step toward reducing its presence in your garden and home. Here’s how to take action effectively.

    Recognize a tiger mosquito easily: how to do it?

    We often talk about it without having clearly identified it. However, this mosquito has some specific visual characteristics. It measures only 5 to 10 millimeters, but its black and white stripes all over its body fully justify its nickname of “tiger mosquito.”

    A less known fact: it is primarily active during the day, with peak activity in the early morning and late afternoon. Unlike other nocturnal species, it can be a nuisance throughout the day.

    Another useful detail: it usually doesn’t fly very far. This mosquito stays within a radius of about 150 meters around its birthplace. Therefore, its presence often indicates a nearby stagnant water source. It typically appears starting in April and can proliferate until November.

    What simple actions can you take to avoid a tiger mosquito invasion?

    Want to take action before they become a real nuisance? Here are some very simple measures to adopt in your home.

    Eliminate stagnant water sources

    Female tiger mosquitoes lay their eggs in tiny amounts of stagnant water. Make it a habit to regularly empty:

    • Saucers under potted plants.
    • Buckets and containers that collect rainwater.
    • Clogged gutters.
    • Outdoor pet dishes.

    Don’t forget to maintain your pool properly with the right chlorine levels.

    Install protective measures at your home access and entries

    Opt for screens on your windows and doors, particularly in well-ventilated rooms. Check their condition regularly. You can even add a screen to your outdoor rainwater storage tanks.

    Dress accordingly

    Wear light, long garments that cover your arms and legs when outdoors during the tiger mosquito’s active period. This is simple but an effective way to limit bites.

    How to effectively get rid of tiger mosquitoes already in your home?

    If you are faced with a significant presence of mosquitoes indoors, here are tips to tackle them quickly:

    • First, check all spots that could harbor larvae: plant saucers, pots without drainage holes, empty bottles with residual water, etc.
    • Use mosquito traps: electric, sticky surface, or pond traps specifically designed to interrupt their breeding cycle.
    • Adopt effective repellent products: prefer spray or lotion repellents on exposed areas to avoid bites.
    • Finally, to quickly eliminate adult insects present in a room, use insecticides in spray or diffuser form. Be sure to strictly follow usage recommendations to avoid any health risks.

    Mosquitoes also dislike fresh air currents: consider installing a fan or air conditioning system to make life difficult for them.

    Preventing and treating simultaneously is an effective strategy against tiger mosquitoes. By regularly adopting these actions, you will protect your home and enjoy the summer season peacefully.


    Have you ever been bothered by the tiger mosquito at home? What tips do you use to get rid of them? Feel free to share your experiences or questions in the comments! We’d love to hear from you.

  • Pellet stove: what you absolutely must do before summer (otherwise, beware of unpleasant surprises)

    Pellet stove: what you absolutely must do before summer (otherwise, beware of unpleasant surprises)

    Does your pellet stove really need maintenance before summer? The answer is yes, and even more than you might think. Let’s explore together why this simple act will save you many worries when the first cold days arrive.

    Why maintain your pellet stove before the summer break?

    Every year, you put your equipment away after the heating season, but have you thought about preparing it for the summer inactivity?

    A neglected stove quickly accumulates residues and dust that can lead to alarming malfunctions upon restart. Not to mention the unpleasant odors that could spoil your winter evenings.

    More seriously, did you know that neglecting maintenance significantly increases the risk of hazardous incidents? Poor upkeep substantially reduces the lifespan and safety of your device. Taking necessary precautions now ensures peace of mind for the upcoming cold season.

    Essential steps to clean your stove effectively

    The maintenance of a pellet stove involves several simple but essential actions to ensure its cleanliness and proper operation. Here are the main tasks you can easily perform at the end of the season:

    • Deep clean the burner pot and ash pan: combustion produces residues that, if left too long, diminish your system’s efficiency.
    • Clean the glass and the external ventilation grills: a dirty glass and blocked grills limit the energy efficiency and aesthetics of your device.
    • Inspect and maintain the combustion chamber to identify any potential issues before they lead to more serious problems.

    Remember: these regular actions significantly prolong the lifespan of your device and ensure a smooth restart next fall.

    Why choose a professional for annual maintenance?

    You might think you can handle everything yourself, but it’s not that simple! Once a year, enlisting a professional for complete flue cleaning and technical checks of your appliance is a legal requirement. They perform a thorough cleaning and inspect every component to ensure your stove is in perfect condition.

    This annual cleaning is not just about safety: it’s also a requirement of your homeowner’s insurance. Regular professional maintenance ensures compliance with your installation and helps maintain the validity of manufacturer warranties.

    Failure to comply could expose you to greater risks of serious incidents or, even worse, result in your insurance refusing to cover any damages.

    Beware of fire risks and unnecessary expenses!

    A poorly maintained stove poses a real hazard: the risk of fire. Every year, many homeowners face losses often linked to negligence, easily preventable with this simple annual appointment.

    Have you thought about scheduling this appointment now? Choose a certified professional, available and well-equipped. Consider this step as a long-term investment in the performance and safety of your home.

    Key points for effective maintenance before summer:

    Before putting your appliance to rest during the warm months, here’s a quick reminder to ensure nothing is forgotten:

    • Perform essential cleanings (burner pot, ash pan, glass, grills, combustion chamber).
    • Have your installation checked by a certified professional at least once a year.
    • Schedule your annual flue cleaning promptly to validate your homeowner’s insurance.

    By taking care of your pellet stove today, you can save yourself many future worries. Upon your return from vacation, you will appreciate the comfort and peace of mind provided by an efficient and safe heating system.


    Your opinion matters to us! Have you ever considered scheduling your stove maintenance before summer? What problems have you encountered with an improperly maintained device? Feel free to share your experiences in the comments; we would love to read them!

  • In May, plant these 11 must-have flowers for a vibrant color garden (and with little maintenance)

    In May, plant these 11 must-have flowers for a vibrant color garden (and with little maintenance)

    The month of May marks the true beginning of beautiful days, and with it comes the perfect opportunity to refresh your garden. However, be cautious—it’s essential to plant wisely! Before selecting your plants, ensure that all risk of frost has passed.

    Ready to get started? Here is a selection of 11 flowers to plant in May for a vibrant garden this summer!

    Perennial or annual flowers to adopt in May for your summer plantings

    To make your garden bloom effortlessly, choose from these easy-to-grow varieties suited to the season.

    1. Agapanthus: an elegant Mediterranean touch

    The Agapanthus boasts large blue or white flowers, forming beautiful round umbels. This perennial is perfect for creating stunning flowering beds.

    Blooming Period: June to August.

    Helpful Tip: The Agapanthus is not fond of severe cold. If you live in an area with harsh winters, consider planting it in a pot. Bring it indoors when the temperature approaches -5°C.

    2. Anemone for its delicate colors

    This robust perennial comes in a variety of colors (blue, red, pink, or white). It will be your ally early in the season with its light petals.

    Blooming Period: May to June.

    Helpful Tip: Protect it from winter cold by covering its base with mulch.

    3. Brachycome, the miniature daisy

    Charming and delicate, these fine flowers resemble tiny daisies, perfect for dressing borders, window sills, or as ground cover.

    Blooming Period: June to September.

    Helpful Tip: Watch out for slugs that love their young shoots!

    4. Caltha palustris: for humid gardens

    This semi-aquatic flower, also known as “water buttercup,” thrives happily near ponds or in saturated soils.

    Blooming Period: May to June.

    Helpful Tip: Plant it near a pond or in very moist soil to see it thrive.

    Annual flowers to easily sow in spring

    Your garden would be incomplete without these colorful varieties that bloom abundantly.

    • nasturtium: blooms from late June until the frost, attracts ladybugs to protect your vegetable garden from aphids.
    • Chrysanthemum: an autumn flower to plant in spring to avoid thermal shock.
    • Purple coneflower: robust and hardy down to -15°C, its flowers last from July to autumn.
    • Marigold: grown as an annual, it repels aphids and pests in the vegetable garden, with generous blooms from spring to the first frost.
    • Annual lavatera: very easy to grow, but be cautious of its invasive nature if it self-seeds every year.

    Two essentials for a colorful summer garden

    10. Petunia: generous and easy to maintain

    The petunia displays a profusion of colors throughout summer, from mauve to white, and vibrant red.

    Blooming Period: July to October.

    Helpful Tip: Regularly remove faded flowers to encourage new blooms.

    11. Sunflower: spectacular symbol of the sun

    The sunflower, a faithful companion of summer, adds height and cheer with its striking golden-yellow blooms that can reach up to 4 meters tall.

    Blooming Period: July to October.

    Helpful Tip: Plant it in full sun but sheltered from the wind! A simple support (stake) will help it achieve its full stature proudly.

    Practical materials for your flower plantings in May

    To combine flourishing gardening with environmental respect, here are some essentials:

    • A peat-free potting soil, preserving fragile natural habitats.
    • Compost made from your kitchen scraps or local restaurant waste.
    • A raised garden bed that is ideal for mixing flowers and vegetables.
    • A hand rake and trowel that are practical and easy to use.
    • A seed spreader for evenly distributing seeds and fertilizers.
    • A water collector as a valuable ally to save this vital resource.

    Remember: gardening can be simple and eco-friendly!


    And what flowers do you usually plant in May? Feel free to share your own tips! What results do you typically get with these varieties? Do you have a favorite among those presented in this article? Share your thoughts in the comments; we’d love to hear from you!

  • Stop taking apart the oven door to clean it better: this little homemade tool does all the work!

    Stop taking apart the oven door to clean it better: this little homemade tool does all the work!

    Cleaning the oven glass can quickly turn into a true nightmare. With burned grease residue and hard-to-reach corners, many people end up completely disassembling the door of the appliance. However, this impulse, in addition to being risky, is entirely unnecessary. A simple clothes hanger could very well become your ultimate ally. Yes, this seemingly innocuous piece of metal, often forgotten at the back of a closet, can revolutionize your cleaning chore.

    Let’s explore together how to transform this ordinary hanger into a formidable cleaning tool, without effort, without disassembly, and most importantly, without wasting time.

    The Hanger: An Unexpected Cleaning Tool

    Who would have thought that such a simple object could be so effective? The metal hanger, often used to hang clothes from the dry cleaner, possesses ideal characteristics: it is thin, flexible, yet rigid enough to reach tricky spots. With just a few quick adjustments, it can be transformed into a true household cleaning accessory.

    Simply unfold the hanger to create a long rod. Then, by bending the end into a small hook shape, you can create a fine and agile structure, perfectly capable of slipping into the tiny crevices of the oven door.

    A Quick and Economical Preparation

    To use this ingenious device, it couldn’t be simpler. Take a microfiber cloth, ideal for capturing dirt without scratching the glass. Generously soak it with white vinegar, a natural and economical cleaner recognized for its effectiveness against grease and baked-on residues.

    Next, wrap this cloth around the hooked end of the hanger, ensuring it stays in place. You can add a small rubber band if necessary for better fixation. Your DIY cleaning tool is ready to use in less than two minutes.

    A Gentle Method of Use

    There’s no need to disassemble the glass, search for microscopic screws, or risk breaking a fragile piece. Simply slide the covered end of your hanger into the slots between the glass panes of the oven door. Some models even have a specific opening designed for this type of maintenance, often overlooked because it’s not well known.

    Then make a few gentle back-and-forth movements. The microfiber cloth, combined with the degreasing action of the white vinegar, will catch the dirt and lift stains in just a few swipes. In just a few minutes, the glass of your oven will regain its original transparency, without disassembly, without excessive effort, and without expensive tools.

    Why You Should Avoid Disassembling the Oven Glass

    Disassembling the door of an oven to clean the glass may seem tempting, but it is a delicate operation reserved for trained technicians. The risks are numerous: loss of screws, improper reassembly, damage to thermal seals, and in the worst case, breaking the glass.

    Moreover, most manufacturers strongly advise against this type of manipulation outside of professional interventions. A mishandling can void the warranty of your appliance. So why expose yourself to so many risks when a simple, quick, and safe solution exists?

    The Benefits of a DIY Solution

    Adopting this hanger method has numerous benefits. First, it is extremely economical: an old hanger, a cloth, and some vinegar are all you need. No need to buy overpriced specialized accessories.

    Next, it is eco-friendly. By prioritizing white vinegar, you avoid the use of harsh chemical products that pollute your home and the environment. Not to mention that this gentle cleaning extends the lifespan of your oven.

    Finally, this tip is immediately accessible. No need to order online or rush to a store. With everyday items, you can achieve professional results at home.

    Regular Maintenance for a Spotless Oven

    To keep your oven glass sparkling without excessive effort, it’s best to adopt a suitable cleaning frequency. It is recommended to use your homemade device after a few uses of the oven, especially after messy cooking such as casseroles or roasts.

    A quick pass with your magic hanger and vinegar-soaked microfiber will prevent grease from deeply embedding. A few regularly invested minutes will save you hours of tedious cleaning later.