Blog

  • Bad news for slugs and snails: these 4 natural tricks will make them disappear

    Bad news for slugs and snails: these 4 natural tricks will make them disappear

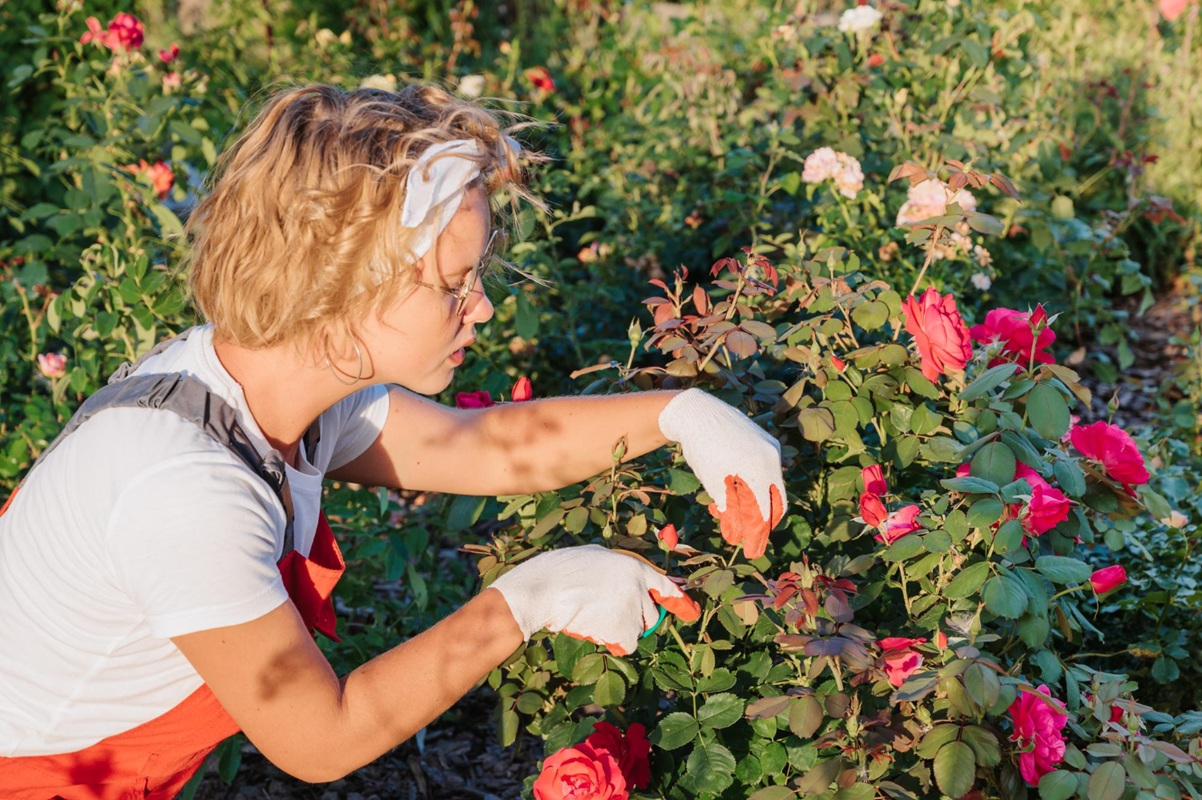
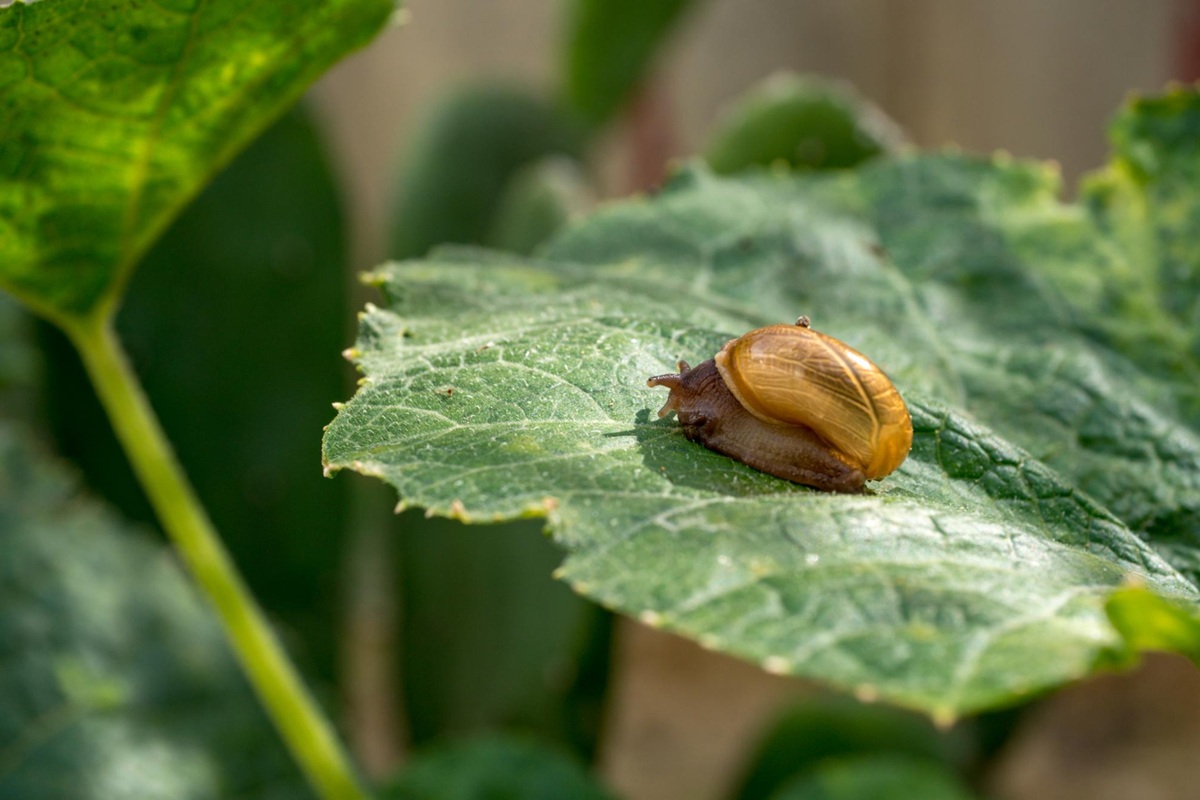
    Are you proud of your plants? You should be! There’s nothing more frustrating than waking up to find your salads pierced, nibbled, and completely devastated by the nocturnal visit of snails and slugs. But don’t panic: there are effective and entirely natural ways to protect your crops. Here are four practical methods to effectively repel these unwanted guests without chemical products.

    1. Create natural impenetrable barriers

    Why not prevent these gastropods from reaching your young shoots directly? Installing natural protective barriers around your crops is a simple and effective solution.

    Certain natural products that can be spread around your plants discourage slugs and snails from moving about, creating an uncomfortable zone for them:

    • Wood ash dries out their mucus and disrupts their movement.
    • Dry coffee grounds are unpleasant to the touch for these mollusks.
    • Wood shavings or crushed eggshells, with their sharp texture, make crossing very uncomfortable and unappealing.
    • Hemp mulch is particularly effective, thanks to its unique texture that poses a serious obstacle for these pests.
    • Lastly, you can place fern leaves as mulch: not only do they protect the soil, but they also effectively repel gastropods.

    2. Attract them into clever traps

    If, despite your precautions, you still face nocturnal invasions, try beer traps. Place shallow containers, filled with beer halfway, level with the ground in your crops. The attractive scent lures them in, but they can’t escape.

    Another easy method: set up some artificial shelters in damp areas of your garden, like tiles or simple boards. Slugs and snails will take refuge there during the day, allowing you to easily collect them each morning.

    3. Use effective natural repellent sprays

    Some entirely natural preparations are highly effective at repelling these little invaders without harming your crops or the environment.

    Here are two simple recipes to try at home:

    • Bracken fern decoction: soak 100 g of fresh ferns in a liter of water overnight. Then, boil this decoction for 20 minutes, strain it, and spray it early in the morning or at sunset.
    • Soap nuts rich in saponin are also very effective. This natural substance acts as an excellent repellent for slugs and snails.

    These preparations are healthy and easy to make: give them a try!

    4. Naturally foster predators of gastropods

    Your garden can become your ally! Did you know that some animals and insects are natural regulators against snails and slugs?

    Among the valuable allies to attract are:

    • Hedgehogs, who love mollusks.
    • Some birds like blackbirds, thrushes, and starlings, always on the lookout for this type of food.
    • Finally, insects such as ground beetles are also very effective in controlling their population.

    How can you encourage their presence in your garden? Simply create small natural habitats like piles of wood, mixed hedges, or an accessible small water point. A lively garden is a protected garden!


    Have you tried any of these methods? Which ones work best according to your experience? Feel free to share your tips in the comments below! Your input is valuable and can help the entire community of amateur gardeners. Get typing: we can’t wait to hear from you!

  • Tired of flies? Here are 3 tips to create an ultra-effective trap (and you already have everything at home)

    Tired of flies? Here are 3 tips to create an ultra-effective trap (and you already have everything at home)

    Did flies ruin your last summer, and are you determined not to go through that nightmare again? You’re right to take action: these little pests are not only annoying but also potential carriers of bacteria.

    Today, we offer you simple and eco-friendly solutions to effectively and sustainably get rid of flies using homemade traps.

    1. Transform a bottle into a fly trap

    Why throw away your old plastic bottles when they could make the perfect fly trap? Here’s how to create your own customized trap in a few steps:

    • Remove the cap and clean the bottle thoroughly with hot water.
    • Cut the bottle in half horizontally (the bottom part should be larger than the neck).
    • Flip the upper part and place it inside the lower part to form a funnel, then secure them with tape or staples.
    • Pour one of the attractant mixtures listed below into your trap. Once they enter, the flies won’t be able to escape

    2. Use a jar to naturally trap flies

    If you prefer a more sustainable and eco-friendly solution, opt for a glass jar or simply a cup. Here’s how to proceed:

    • Clean your jar or cup thoroughly with hot water.
    • Fill it almost to the brim with an attractant mixture (see below in the last section).
    • Cover the jar with plastic wrap and poke a few small holes for the flies to enter but remain trapped inside. Secure the wrap with a rubber band.
    • You can also make a paper funnel or use a pierced coffee filter: just remember to add less liquid to avoid overflow.

    3. Create your own fly sticky tape

    You probably know those fly traps available in stores. Did you know that you can easily make your own at home?

    • Cut a strip of yellow paper and punch holes to thread a string through.
    • Melt together two tablespoons of honey and one tablespoon of water and let it cool slightly.
    • Generously spread this mixture on your paper.
    • Hang your sticky strip: it’s as simple as that! Just remember to replace the trap when it’s full.

    Attracting flies with irresistible mixtures

    Wondering which mixture works best to attract flies to your trap? Here are several proven and easy recipes you can prepare at home:

    The brown sugar and yeast mixture

    A classic that always works:

    • Dissolve 50 g of brown sugar in 200 ml of warm water.
    • Then sprinkle about 1 g of baker’s yeast on top without stirring.
    • Wait a few days for fermentation to occur: you’ll have a powerful attractant lasting up to two weeks.

    Attracting flies with apple cider vinegar and dish soap

    A quick but effective preparation:

    • Heat some apple cider vinegar in a pan.
    • Then add a few drops of dish soap to prevent the flies from escaping once trapped.
    • Pour it into the trap and let it work its magic.

    The milk, sugar, and pepper mixture

    An astonishing yet successful homemade recipe tested by our grandmothers:

    • In a saucepan, mix 50 cl of milk, 100 g of brown sugar, and 50 g of ground pepper.
    • Heat gently until it simmers for about ten minutes.
    • Pour this mixture into your fly trap. Guaranteed success!

    Other effective ingredients to attract flies to your trap:

    • A few centimeters of red wine or beer at the bottom of the container
    • Water with a sweet product like honey, syrup, or jam
    • A piece of very ripe fruit to attract flies without necessarily killing them

    What did you think of these fly-fighting tips? Have you tried any of these methods at home? Do you have other eco-friendly tips to repel or trap these nuisances? Share your experiences or ask your questions in the comments below!

  • This little-known tree brightens gardens in spring with a breathtaking bloom

    This little-known tree brightens gardens in spring with a breathtaking bloom

    Are you eager to witness a breathtaking floral display as spring kicks off? What if I told you that a modest little tree, often overlooked in our gardens, can burst into stunning white blooms as early as April? This delicate shrub, brimming with charm, is none other than the serviceberry.

    Though not widely known, it is highly appreciated by those who have embraced it, transforming an ordinary garden into a true springtime masterpiece. Here’s everything you need to know to welcome and adopt it in your own garden.

    Discover the serviceberry, this small tree with great qualities

    Originating from North America and Asia, the serviceberry (genus Amelanchier, family Rosaceae) comprises about twenty species found in our gardens, including Amelanchier lamarckii (Lamarck serviceberry) and Amelanchier canadensis (Canadian serviceberry).

    This shrub features a slender and light silhouette, typically reaching heights of 3 to 6 meters. Highly valued for its elegant form, the serviceberry fits seamlessly into smaller spaces. Its grey bark, smooth yet subtly fissured over time, adds a refined look even in winter.

    Looking to beautify a neglected corner of your garden or a somewhat empty terrace? This unassuming friend is the perfect solution.

    Also read:  Last chance to prune these 6 shrubs before spring (after, it will be too late)!

    A spectacular bloom from the first days of spring

    By late March or early April, depending on your region, the serviceberry becomes adorned with a multitude of star-shaped white flowers clustered delicately. This floral explosion often appears even before the leaves, creating a striking visual effect.

    Imagine a delicate white veil covering the entire tree… impressive, isn’t it? This stunning bloom lasts for two to three weeks, providing a lengthy period to truly savor it. Enjoy this unique spectacle, especially at a time when few other plants are flowering in your garden.

    A small tree to enjoy all year round

    After its dazzling spring entrance, the serviceberry continues to offer a range of colors and flavors throughout the year:

    • In summer, small berries known as serviceberries appear. Edible, they have a sweet flavor that sometimes resembles blueberries. You can eat them fresh or make delightful jams.
    • In autumn, its foliage takes on beautiful shades: yellow, orange, and even fiery red depending on the varieties. A true feast for the eyes!
    • Even in winter, its bark provides contrast and elegance to the garden when bare.

    Find the best place for the serviceberry in your garden

    What location to choose for successful bloom?

    The serviceberry adapts to almost any conditions. A sunny spot naturally fosters a generous bloom and vibrant autumn colors.

    Partial shade is also tolerated easily. Prefer a well-drained soil, neutral to slightly acidic. However, be cautious of very calcareous soils, which may lead to yellowing of the foliage.

    Also read:  Natural weeding: Here’s how to use coarse salt to effectively eliminate weeds!

    Some ideas to integrate this versatile shrub

    The serviceberry finds its place easily in different landscaping configurations, for example:

    • Solitary: in the center of a lawn as a standout ornamental tree;
    • As a flowering hedge: combine several specimens to create a lively and spectacular separation;
    • In a bed: to be planted at the back to create a beautiful backdrop;
    • In a pot: in a large container on a terrace to brighten up a limited outdoor space;
    • In a semi-wild edge: perfect next to a woodland for a natural garden vibe.

    Pair it with spring bulbs, ferns, or grasses to enhance the decorative effect.

    Some practical tips for planting and caring for your serviceberry

    Ideal planting time for your serviceberry is between October and March, avoiding freezing periods. If opting for a container-grown shrub, just avoid very hot days. Here are a few simple steps:

    • Dig a hole twice as wide as the root ball and loosen the soil at the bottom;
    • Add some compost to the original soil;
    • Place the shrub, ensuring that its collar is level with the soil;
    • Fill the hole, water generously, and mulch with wood chips to retain moisture.

    For maintenance, it’s just as easy: water regularly for the first two years, then only intervene in cases of prolonged drought. Pruning is not mandatory; just limit yourself to removing any obstructive branches right after flowering.

    Attract bees and birds with this spring treasure

    By adding the serviceberry to your garden, you’re also making a valuable contribution to your garden’s biodiversity. Its early bloom provides an essential nectar resource for bees and other pollinators in spring.

    Also read:  Lavender: Should you prune it before spring? Here’s the advice from professionals!

    As for birds, they will relish its juicy little fruits in summer. You can see that the serviceberry combines striking beauty with ease of care. Why not give it a spot in your garden this year?


    Do you already have a serviceberry in your garden? Share your experience with our readers! What is your favorite variety, and why? What do you think of serviceberries: do you enjoy them fresh or in jam? Leave a comment to join the discussion!

  • 5 Bad Habits That Sabotage Your Garden Without You Knowing It (And Many People Do Them)

    5 Bad Habits That Sabotage Your Garden Without You Knowing It (And Many People Do Them)

    Spring is finally here, and you’re probably eager to dive into the maintenance and beautification of your garden. Nature is awakening, plants are starting to grow, making it the ideal time to plant and sow. But are you sure you’re not missing any essential steps?

    To achieve a flourishing and vibrant garden, here are some bad practices you should absolutely avoid.

    1. Water your garden at the hottest time of day

    With the arrival of sunny days, you likely enjoy tending to your plants without necessarily considering the timing of your watering.

    This is a serious mistake! Why? When you water your garden in the full afternoon sun, the water evaporates very quickly, which does not benefit your plants and can even scorch their delicate leaves.

    Opt for watering early in the morning or at dusk. These cooler times will allow your plants to efficiently absorb all the water they need.

    2. Choose plants that are incompatible with your garden

    Your heart races for that gorgeous hydrangea you spotted at the garden center? Before giving in, ask yourself if your garden conditions are suitable for this plant. Soil, exposure, temperature… every plant has its preferences and requirements. Here’s a helpful reminder:

    • Check the light needs (sun, shade, partial shade);
    • Identify the necessary soil type (moist, dry, clayey, calcareous, acidic).

    This small effort will save you many disappointments, especially if you are starting a vegetable garden.

    3. Forget to regularly enrich your soil

    The success of your garden directly depends on the care you give to the soil. Plants draw numerous essential nutrients from the earth, gradually depleting its natural resources. To effectively and organically nourish your soil, consider:

    • Compost;
    • Well-decomposed manure;
    • Vegetal mulch or enriched potting soil.

    Always opt for natural or organic fertilizers (natural humus, crushed eggshells, etc.) rather than chemical ones. A well-maintained soil will yield healthy plants!

    4. Not leaving enough space between your plants

    When planting your greenery, always keep in mind that they will grow. While a densely packed flowerbed may look stunning, be careful not to inadvertently create a competition between your plants. Water, light, nutrients: each plant will silently compete for survival if space is too limited.

    Check the instructions when purchasing seeds or plants, adhere to recommended spacing, and regularly ensure that each plant has enough room to thrive.

    5. Not actively protecting your garden from pests

    Growing beautiful plants is great. Keeping them safe from garden enemies is even better! Aphids, slugs, and other snails pose an insidious threat that can ruin your hard work in no time.

    Regularly inspect your plants for intruders and take prompt action with eco-friendly solutions to effectively keep them at bay. There are plenty of natural barriers and tricks to protect your garden while respecting the environment.


    Your feedback is important to us! Have you ever made one of these mistakes in your garden? What habit will you change first? Share your experiences by leaving a comment; we would love to exchange ideas with you!

  • Are you sure you wash your sheets often enough? Here is the frequency recommended by experts

    Are you sure you wash your sheets often enough? Here is the frequency recommended by experts

    Do you really know how often it’s recommended to wash your sheets? Since we spend a significant part of our lives in bed, this question is worth asking. Sleeping on clean sheets is often associated with comfort and peaceful sleep, but that’s not all.

    Discover the concrete benefits of regularly maintaining your bedding and how often you should clean it according to your lifestyle.

    Why Regularly Washing Sheets Is Good For Your Health

    Sleeping on fresh, clean bedding is not just pleasant; it’s a wise choice to protect your health. Regularly changed sheets offer:

    • Better comfort for sleeping
    • Effective reduction of allergic reactions and skin irritations
    • Easier waking up, with a sense of well-being that improves daily life

    But the advantages don’t stop there.

    Extend the Life of Your Bedding

    Did you know that regularly caring for your sheets ensures a longer lifespan for your bedding? Indeed, frequent maintenance limits damage to the textile fibers and preserves their softness and elasticity.

    Your sheets will thus last longer while remaining pleasant against your skin.

    Barrier Against Bacteria and Dust Mites

    Your bed is unfortunately not immune to unwanted guests such as bacteria, dust mites, and various allergens. These microorganisms multiply rapidly in a poorly maintained environment.

    A regular wash is thus your best ally in keeping them at bay and safeguarding your family’s health.

    How Often to Change Sheets Based on Your Shower Routine

    We don’t always ask ourselves this question: when should we actually wash our sheets? The answer varies significantly depending on your daily habits, particularly your shower timing. So, do you prefer to shower in the morning or at night?

    If You Shower in the Morning

    If your daily wash typically happens in the early morning, it’s best to wash your sheets every week. Why? Simply because after a full day, your skin accumulates various impurities.

    These impurities (sweat, dead skin cells, pollutants…) transfer directly to your bed if you lie down without showering first.

    If You Shower Before Sleeping

    Do you prefer a nice soothing shower before heading to your pillow? Good news! You can space out your sheet washing frequency.

    In this case, experts recommend less frequent cleaning: a wash every two weeks is sufficient, especially if you wear pajamas, as this significantly reduces the transfer of dirt to your bedding.

    This simple habit keeps your bed pleasant for longer without compromising the overall hygiene of your bedding.

    How to Adjust Washing Frequency Based on Seasons

    Seasons undeniably influence our needs regarding bedding maintenance. In winter, the lower temperatures limit sweating and allow for a longer interval between washes, while summer changes everything.

    In the hot months, heat undoubtedly increases nighttime sweating. It becomes essential to wash your sheets more frequently, with a weekly cleaning being ideal. So adjust your washing frequency according to the weather and your sensations to maintain a pleasant and healthy sleeping environment.


    And you, have you recently considered how often you change your sheets? Do you take the season and your daily habits into account? Share your thoughts in the comments below! We’d love to hear your tips, and your experiences could certainly benefit other readers!

  • This simple kitchen ingredient boosts your tomato production like never before

    This simple kitchen ingredient boosts your tomato production like never before

    In gardening, the best tips are often the simplest. Commonly used in our homes, baking soda has astonishing properties for your tomato plants. Did you know that applying baking soda directly at the base of your tomato plants can improve their growth while protecting them from diseases?

    If this eco-friendly tip piques your interest, here’s how this natural white powder can become your indispensable ally for bountiful harvests.

    A balanced soil with baking soda

    For healthy tomatoes, the soil pH plays a crucial role, ideally between 6 and 7. Do you know the pH of your soil? Here, the buffering action of baking soda can make all the difference.

    Baking soda regulates the soil, preventing excessive acidity or alkalinity. The result: nutrient absorption is optimized, allowing your plants to thrive in the best possible conditions.

    Want vigorous and productive tomatoes? Make it a habit to use baking soda to regularly balance your soil!

    Naturally protect your tomatoes from fungal diseases

    Have you ever dealt with blight on your tomatoes? This fungal disease, particularly threatening to crops, can be prevented without resorting to heavy chemical treatments.

    Once again, baking soda comes to your rescue with its natural antifungal properties, effective against such diseases.

    Easily prepare your antifungal mixture

    To prevent blight or other harmful fungi, here’s a quick recipe every gardener should know:

    • Add one tablespoon of baking soda to one liter of water.
    • Mix the solution thoroughly.
    • Using a spray bottle, gently apply this mixture to the leaves, preferably in the early morning or late afternoon, never in direct sunlight to avoid burning them.

    A moderate application every two weeks is usually sufficient. Overdoing it could harm the soil quality by unnecessarily increasing its salinity.

    Using baking soda directly in the soil: application method

    Sprinkling baking soda directly at the base of your tomato plants is also an effective and easy method to adopt. Here’s how to do it:

    • Scoop about one teaspoon of baking soda around the roots, without excess.
    • Repeat this process approximately every two months, but no more.

    This simple approach naturally strengthens the plants’ defenses while gradually improving the soil structure.

    What to be careful of when applying directly?

    Always be cautious to respect the recommended doses, as overuse could lead to harmful salt build-up in the soil.

    Always observe your plants after each application: they will inform you if your actions are appropriate.

    Other plants that love baking soda

    Did you know? Tomatoes are not the only ones that appreciate this magical powder! Experienced gardeners have found that using baking soda is also beneficial for plants like roses and strawberry plants.

    By adjusting the quantities correctly, you limit the risk of fungal diseases and stimulate the overall vigor of your plants. However, be careful not to overlook the specific needs of each plant. Every plant is unique and requires tailored attention to unlock its full potential.

    As you can see, baking soda is a fantastic ecological solution at your fingertips, making your gardening easier and more environmentally friendly.


    Have you ever tried baking soda in your garden? What have your experiences been with your tomato plants or other crops? Your tips interest us! Leave us a comment to share your techniques and observations with us.

  • Black matt kitchen: the foolproof method to say goodbye to fingerprints without damaging your furniture.

    Black matt kitchen: the foolproof method to say goodbye to fingerprints without damaging your furniture.

    Matte black kitchens captivate with their refinement and contemporary allure. However, this sleek aesthetic requires careful attention. Matte surfaces, while less prone to reflections compared to glossy finishes, easily show fingerprints, splashes, and dust. To maintain the shine of your kitchen without compromising its delicate finish, it is essential to adopt suitable cleaning methods.

    Essential Steps For Effective Cleaning

    Regular and gentle maintenance is key to preserving the beauty of your matte black furniture. Start by dusting the surfaces with a dry microfiber cloth. For light stains, a slightly damp cloth is often sufficient to remove them. In case of more stubborn dirt, prepare a solution of warm water mixed with black soap or Marseille soap. Apply it with a soft cloth in circular motions, then rinse with a clean, damp cloth before drying thoroughly.

    Preferred Products And Those To Avoid

    To clean your matte black furniture without damaging it, opt for gentle and non-abrasive products. Cleaners specifically designed for matte surfaces are ideal. Avoid products containing harsh chemicals such as alcohol, ammonia, or bleach, as they can dull the finish. Similarly, abrasive sponges and dusting wipes should be avoided, as they can scratch the surface or leave residues.

    The Natural Tip That Makes A Difference

    For those wishing to adopt a more ecological and economical approach, a simple yet highly effective solution is to use a homemade mixture of diluted white vinegar and water (in equal parts). This natural cleaner gently degreases without altering the matte finish.

    Preventing Rather Than Healing: Good Habits To Adopt

    Adopting certain habits can greatly facilitate the maintenance of your matte black kitchen. Wipe up spills and stains immediately to prevent them from setting in. Use handles or knobs to minimize direct contact with surfaces. Limit the use of greasy products near worktops and avoid leaving water pooled on surfaces, as this can cause marks or rings.

    Maintaining a matte black kitchen therefore requires particular care, but with the right actions and suitable products, it is entirely possible to preserve its elegance without excessive effort. Regular cleaning, the use of gentle products, and the adoption of good daily habits will allow you to fully enjoy your kitchen while maintaining its original beauty.

  • This foolproof cake is made with just a simple glass of milk (no scale needed) and it’s delicious

    This foolproof cake is made with just a simple glass of milk (no scale needed) and it’s delicious

    You have probably made a yogurt cake before, a dessert that is simple and quick to prepare. But have you heard of its cousin, the “glass of milk” cake? J

    ust as easy to make and equally delicious, this dessert is a favorite for family snacks or impromptu desserts. With a moist texture and delicate flavor, this cake will charm you with its simplicity and effectiveness. Discover this recipe without further ado, which could become your new favorite for delighting both young and old.

    What Is the “Glass of Milk” Cake?

    The “glass of milk” cake is based on the same principle as the yogurt cake. It’s made with ingredients you likely already have at home, and measurements are taken in a fun way: using a simple glass as a measuring tool. This time, instead of a yogurt pot, a glass of milk serves as the base for the recipe.

    This cake is perfect for moments when you want to please without spending hours in the kitchen. No need for a scale, no need to complicate things; just fill your glass and follow the steps. An absolute breeze, even for novice cooks or those in a rush.

    How to Prepare This Cake in Just a Few Minutes?

    Preparing this cake is super simple. In just a few steps and with basic ingredients, you’ll have a wonderfully fluffy cake. Here’s how to prepare this dessert in no time.

    1. Preheat the oven to 180°C.
    2. In a large bowl, pour one glass of milk. This will be your base measurement for the remaining ingredients.
    3. Next, add three eggs, one glass of sugar, and mix everything well.
    4. Incorporate one glass of oil (sunflower or canola), followed by two glasses of sifted flour mixed with a packet of baking powder.
    5. Mix until you get a smooth batter, free of lumps.
    6. Pour the mixture into a greased and floured mold, then bake for about 30 to 40 minutes, depending on your oven. The cake should be nicely golden on top and slightly springy to the touch.

    Why Is the “Glass of Milk” Cake So Popular?

    The success of the “glass of milk” cake is due to several factors that make it an essential dessert, especially for families or cooks in search of simplicity.

    1. Ease and Speed

    With this recipe, there are no headaches or fancy equipment required. You simply use a glass, making preparation accessible to everyone, even those who might not be very familiar with cooking. In less than ten minutes, everything is ready to go into the oven. Quick and convenient, this is the ideal dessert for unexpected snacks or casual meals.

    2. Everyday Ingredients

    There’s nothing more frustrating than starting a recipe only to realize you’re missing an ingredient. Here, there’s no problem: milk, eggs, sugar, flour, and oil are all staples you likely have on hand. That’s why the “glass of milk” cake is a perfect choice for those times when you don’t have time to go grocery shopping.

    3. A Cake to Customize Infinitely

    The advantage of this recipe is that it is easily adjustable. You can add lemon or orange zest for a fresh twist, some vanilla for extra sweetness, or even chocolate chunks for an indulgent touch. Why not incorporate some dried fruits or chocolate chips? Each version of this cake allows you to reinvent it according to your preferences and the ingredients you have on hand.

    Our Tips for Success with This Cake Every Time

    Although the recipe is straightforward, here are some tips to ensure perfect results every time.

    1. Sift the Flour

    This may seem trivial, but sifting the flour before incorporating it into the batter helps avoid lumps and makes the cake lighter and fluffier. It’s a small step that makes a significant difference, especially for simple cakes like this one.

    2. Check the Baking Without Piercing the Cake

    We often tend to poke a knife or toothpick into a cake to check its doneness. With the “glass of milk” cake, there’s another technique: gently press the center of the cake with your fingertip. If it springs back slightly, it’s done. This method avoids leaving a visible mark in the center of the cake.

    3. Vary the Molds

    For a more original touch, consider changing your mold. You can use a loaf pan, muffin tins, or even a bundt pan. This gives the cake a different look while keeping the same recipe.

    Why Choose This Cake for Your Snacks and Desserts?

    In addition to being simple and delicious, the “glass of milk” cake offers several advantages. It’s economical, quick to make, and, above all, adaptable to all tastes. Whether for a kids’ snack, a casual gathering with friends, or just to treat yourself, this cake is sure to please everyone. Its moist texture and gentle flavor make it a versatile dessert, easy to pair with a scoop of ice cream or some fruit compote.

    Its playful preparation, without precise measurements, also makes it an ideal recipe to make with family. Kids love to help and measure ingredients using the glass, making cooking time even more enjoyable.

  • Planting roses: this mistake that almost all beginner gardeners make

    Planting roses: this mistake that almost all beginner gardeners make

    Spring has arrived, and your garden is ready to flourish before your eyes. Among the champions of this beautiful season, the rosebush remains a timeless choice, offering colors, scents, and elegance to your outdoor spaces. Do you want to enjoy the sight of stunning roses when the lovely days come?

    To achieve this result, proper planting is essential. However, be cautious as there are certain pitfalls you should absolutely avoid during the planting process!

    What is the best time to plant your roses?

    For successful installation of your prized rosebushes, timing is key. Did you know that January and February are the ideal months to plant your roses in the ground? During this winter period, the plant concentrates all its energy on developing its root system. Thus, when spring arrives, your rosebushes will have sufficient strength to grow and bloom exuberantly.

    Once March has passed, it’s best not to plant roses directly in your garden. But all is not lost if you’re late: a potted rosebush remains a good alternative. Potted roses can be planted year-round, provided you avoid extreme conditions like severe frosts or intense summer droughts. A few good practices can make a significant difference for successful planting:

    • Choose a beautiful sunny day for planting.
    • Before planting, always make sure to untangle the roots and soak them in water for a few hours.
    • Dig a hole that is large enough and deep enough to properly spread the roots and mix in compost or natural fertilizer to ensure a good start for your rosebush.
    • Finally, water generously to encourage rooting.

    Choosing the ideal location for your rosebush: don’t make this mistake!

    Are you ready to plant your new rosebush? But are you sure you’ve placed it in the right spot? Beware, as there is a frequent but regrettable mistake here: you must avoid replating a rosebush in the same location where another rosebush previously stood!

    Surprised? This practice is highly discouraged. Why? When you plant a rosebush in a spot previously occupied by the same plant, you are dealing with depleted soil. The previous rosebush drew a significant number of available nutrients from the earth, severely limiting the chances of success for the newcomer.

    Worse yet, the risk of disease or pest spread increases significantly if the old rosebush succumbed to an infection. To avoid unpleasant surprises, therefore, choose a well-sunny location that hasn’t hosted a rosebush before. By adhering to this simple rule, you provide your plant with the best possible conditions to thrive in good health.

    Why not propagate your roses yourself?

    Are you tempted by the idea of multiplying your favorite roses rather than buying new ones every year? Good news, rose propagation is a simple technique that can be done at home by following a few easy steps.

    Don’t hesitate to explore this option: it could be economically and environmentally interesting! By practicing your own propagations, you can beautify your garden with new varieties without even visiting a garden center. So why not give it a try?


    Have you ever faced difficulties when planting your roses? We would love to hear your experiences and tips on this topic. Share your stories with our community in the comments below. Have you tried home propagation, or are you considering giving it a shot soon? We’d love to hear your feedback!

  • Don’t let the weather ruin your wooden deck: here are 3 steps to protect it

    Don’t let the weather ruin your wooden deck: here are 3 steps to protect it

    Your wooden terrace is cherished for its warmth and authenticity. However, do you truly know how to protect it from the elements? Rain, UV rays, frost, moss, and fungi can inflict numerous hidden damages each season, which are difficult to repair once they occur.

    Here’s a reliable method you can adopt now to maintain its beauty and durability without unnecessary effort.

    Why is your terrace vulnerable to the elements?

    Wooden terraces have many advantages: they are aesthetically pleasing, comfortable underfoot, and perfect for hosting summer evenings. However, they are also particularly sensitive to the whims of the weather. Why? Because wood, even when treated, remains a natural material that breathes, absorbs water, and reacts to temperature changes.

    Whenever temperatures fluctuate or it rains, the wood swells and shrinks as it dries. This results in cracks and micro-fissures forming, allowing moisture to penetrate deeper. Over time, moss, lichens, and wood-eating pests easily take root, seriously damaging the structure.

    Meanwhile, the sun’s UV rays accelerate wood degradation by gradually destroying lignin, an essential element for strength. The color becomes increasingly dull and greyed. While this natural grey may appeal to some, it often signals significant deterioration.

    A simple three-step method to sustainably preserve your terrace

    To avoid these issues, an effective solution exists in the form of a simple three-step process:

    • Thorough cleaning of the wood
    • Application of a wood brightener (optional but recommended)
    • Durable protection with a wood saturator

    Here’s how to proceed for each of these steps:

    Step 1: A deep cleaning in spring

    When the nice weather returns, it’s time to give your terrace a thorough cleaning, as a simple sweep will not suffice!

    Dead leaves, moss, and dirt encourage humidity-related damage. Start by removing large debris, then scrub the boards with a stiff brush using diluted black soap or a gentle wood cleaner.

    Be careful: if you use a pressure washer, set it to low pressure; excessive power might damage the wood fibers. This thorough cleaning is essential every spring to prevent the buildup of stubborn dirt.

    Step 2: The brightener step to restore the original color

    You may have noticed that over time, your wooden terrace has turned grey. This natural phenomenon is not permanent!

    To immediately revive the original color of the wood, use a specific brightening product. Simply apply this product with a brush or spray, allow it to act (usually about 15 to 30 minutes), and then rinse thoroughly.

    Your terrace will then regain its original brightness. If aesthetics matter to you or if your wood hasn’t been treated in a while, consider incorporating this step every year or every two years.

    Step 3: Apply a saturator for effective and durable protection

    The final step is perhaps the most crucial: the application of a wood saturator. Unlike stains and varnishes, this protective product penetrates deep into the wood fibers, leaving no superficial film. This means it’s easier to maintain, doesn’t peel, and effectively protects your terrace against:

    • UV rays
    • Rainwater infiltration
    • Temperature fluctuations
    • Drying of fibers

    Apply the saturator on your clean and dry terrace in two layers spaced within the same day. In just a few hours, the wood becomes supple, aesthetically enhanced, and perfectly protected for the coming year.

    Depending on your terrace’s exposure, plan for treatment every year or at most every two years. The more your area is exposed to rain and sunlight, the more frequent the treatment should be.

    Simple habits that make a difference daily

    Additionally, a few simple yet effective habits will significantly extend the lifespan of your terrace:

    • Regularly collect dead leaves and avoid placing flower pots directly on the ground.
    • Avoid plastic mats that prevent the wood from breathing properly.
    • Always elevate pots or planters with suitable blocks or saucers.
    • Inspect the condition of screws and fasteners each spring to prevent rusting or potential hazards over time.

    A well-maintained terrace ensures a pleasant and inviting outdoor space for years to come. So, are you ready to take care of your terrace starting today?


    Did you find these tips helpful? Do you have a particular routine you follow each year for your wooden terrace? Share your experiences and tips with us in the comments! We would love to hear your thoughts and discuss the topic with you.