Blog

  • Rusty objects? This super simple trick makes them look like new (and it’s ultra easy)

    Rusty objects? This super simple trick makes them look like new (and it’s ultra easy)

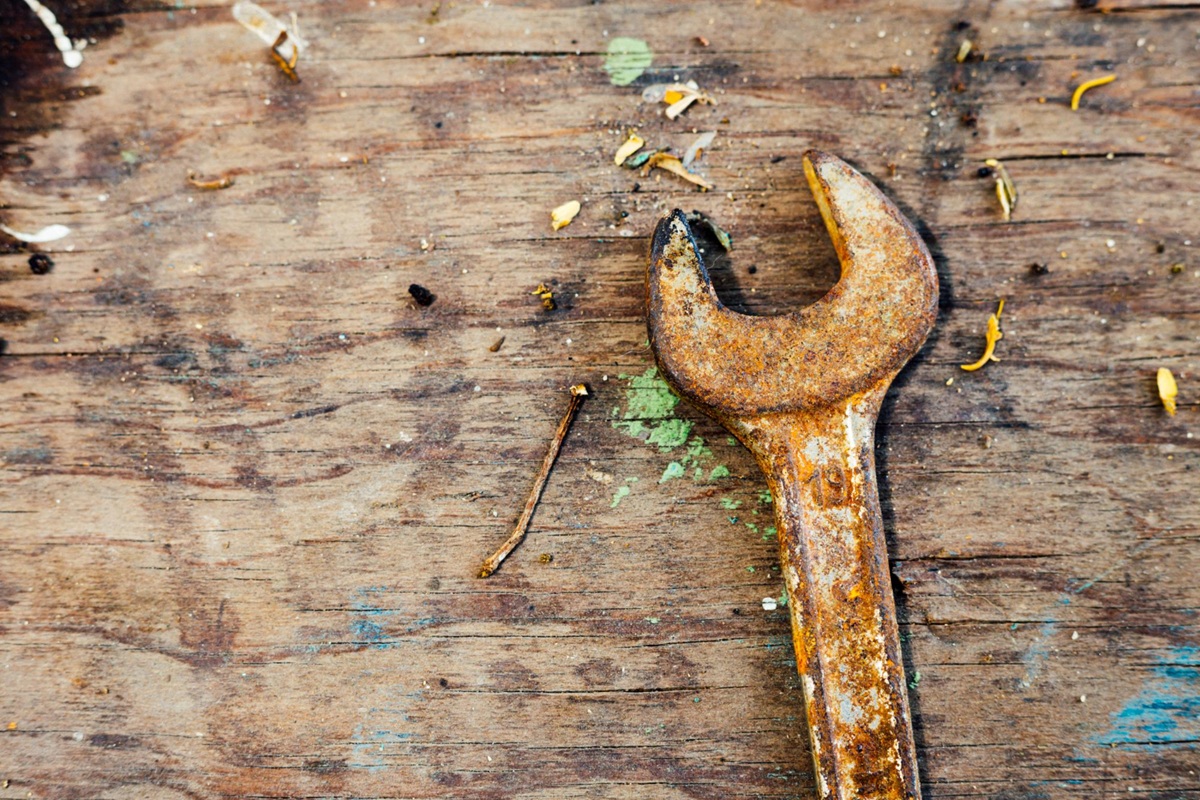
    You’ve probably come across forgotten metallic objects in your garage or drawer, covered in that unsightly orange substance called rust, right? Don’t worry! There’s an economical and eco-friendly solution to easily revive them at home.

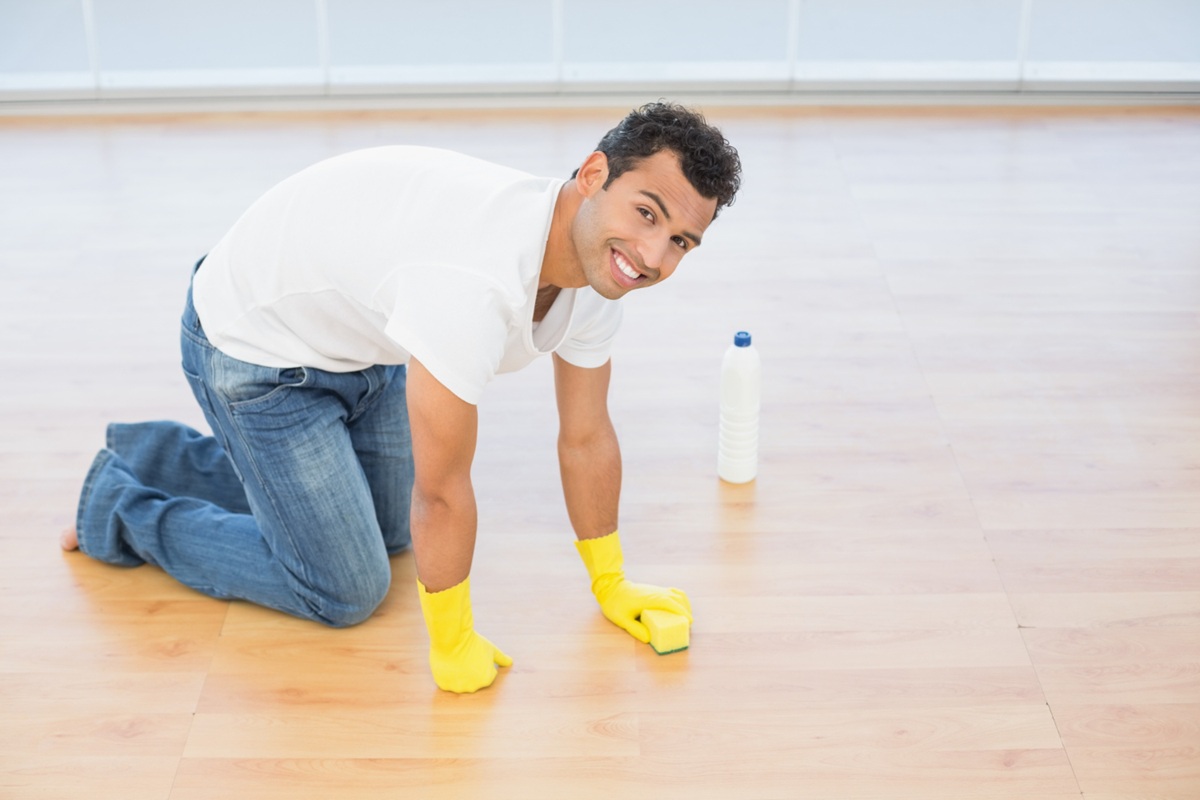
    This common kitchen ingredient that you use for cooking or cleaning windows can also help you restore all your old tools or metallic utensils. Follow the guide; it’s simple!

    Rust details: How it attacks your metallic objects

    Have you ever noticed how quickly a metal object can rust when left outside? Rust appears due to a chemical reaction known as oxidation. When moisture and air come into play, iron and oxygen react to form iron oxide, which is responsible for that reddish hue.

    In very humid environments (over 75% humidity), oxidation accelerates and quickly overwhelms your metallic objects. This reaction explains why your old bike left outside or your abandoned garden tools rapidly lose their initial charm.

    But rust isn’t limited to a few isolated objects. In reality, you can find it all around you:

    • Kitchen utensils: knives, various blades…
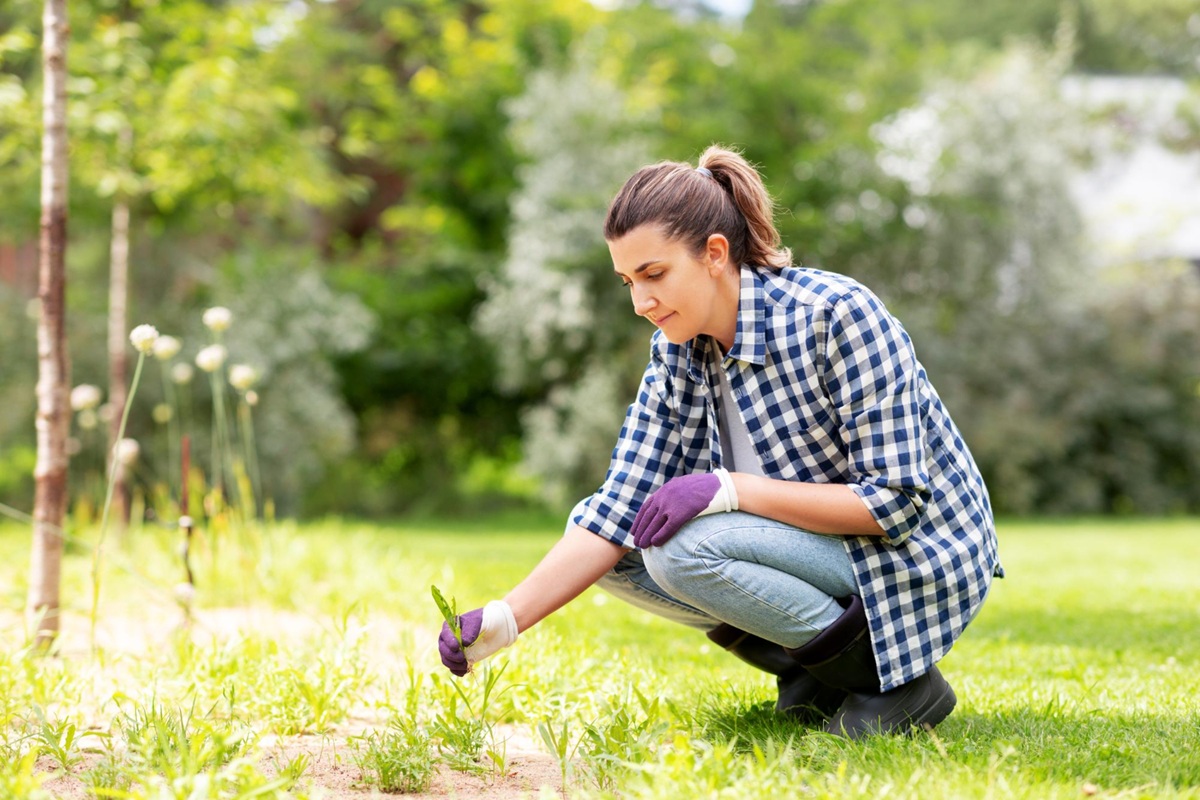
    • Gardening tools: pruners, rakes, and shears.
    • Furniture pieces: old handles, metal grids.

    Focus on the winning ingredient: why choose white vinegar?

    So why rely on this ordinary food item that everyone has in their kitchen? The answer lies in its very properties! White vinegar mainly contains acetic acid, a mild acid that gradually dissolves rust to free the metal underneath.

    When you immerse a rusty object in white vinegar, you essentially initiate a chemical reaction that breaks down the rust over time. The result: your object regains its authenticity after a few hours of soaking.

    Practical guide to effectively remove rust

    Now you’re ready to take action! Here’s how to easily clean your precious metallic objects.

    Required materials

    To ensure effective action, prepare:

    • 1 liter of white vinegar
    • An old toothbrush
    • A soft cloth
    • A container suitable for the size of your object (it should be fully submerged)

    Make sure your object is free from dust; this small detail will facilitate the action of the vinegar.

    Follow the steps step-by-step

    1. Fill the container with white vinegar so that it fully covers the rusty object.
    2. Let the object soak for 24 to 48 hours, depending on the severity of the rust.
    3. At the end of the soaking, remove the object and use the brush to easily scrub off the softened rust.
    4. Rinse with clear water and then dry thoroughly with your soft cloth to prevent future rust.

    Our tips to protect your metal objects over time

    With the rust removed, take a moment to protect the outcome with some simple preventative tips:

    • Coat your objects with special oil or metal wax after cleaning.
    • Consider using anti-rust paints suitable for metal surfaces, ideal for long-term protection.
    • Always store your tools in a dry place, and maybe keep them with silica gel packets to capture any ambient moisture.

    Become a DIY pro with white vinegar

    And why limit the use of white vinegar to just your rusty tools? This accessible product offers a whole range of surprising possibilities for your home repairs and restorations. With it:

    • Revive your cast iron kitchen utensils that have rusted.
    • Quickly restore the original beauty of a rusty bicycle chain.
    • Explore its other practical applications and impressive effects on different types of metals.

    Your family or friends will surely be amazed when they discover your hidden talents during their next visit. So, why not share this foolproof rust removal method with them or even organize a practical workshop to restore their own items together?

    Take care of your objects, discover the subtle art of clever DIY, and unleash your creativity with this accessible solution. With just white vinegar on hand, rust will now be a thing of the past. Dive into your next project right away!


    Has this easy rust removal tip convinced you? Have you already tried it on some of your items? Your feedback on the effectiveness of this method is valuable! Please leave a comment with your impressions.

  • The secret to a radiant floor? This natural ingredient that you already have in your cupboards!

    The secret to a radiant floor? This natural ingredient that you already have in your cupboards!

    Do you dream of being welcomed home by a flawlessly clean floor every time you step through the front door? Good news! Achieving this result doesn’t necessarily require expensive and harmful chemical products.

    With a common ingredient found in most kitchens, you can enjoy a pristine home naturally. Let’s explore together how to take advantage of the surprising properties of this eco-friendly, economical, and effective product.

    Why give up chemical cleaners forever?

    As you may already know, conventional cleaning products often contain potentially irritating chemical elements, such as phosphates and quaternary ammoniums. These substances linger on your floors after use and can end up on your hands or feet, increasing health risks.

    Not to mention the ecological consequences. With every rinse, these compounds enter the water supply, polluting rivers and destabilizing ecosystems. Embracing a natural alternative is a simple and responsible gesture to protect our planet.

    White vinegar, your unexpected ally for sparkling floors

    Known primarily as a culinary ingredient, white vinegar has numerous benefits that are still unknown to many. It’s a true natural treasure!

    Read also:  Here are 5 strawberry varieties perfect for growing on your balcony (even if you don’t have a green thumb)

    Historically recognized for its powerful cleaning abilities, it will effectively accompany you in your daily routine without harming your health or the environment.

    Composed of 5 to 8% acetic acid obtained through alcohol fermentation, white vinegar showcases particularly effective action against stubborn dirt and bacteria. It descaling, disinfects, and degreases all surfaces, quickly becoming indispensable in your cleaning routines.

    How to prepare an effective cleaning product with white vinegar?

    You’ll see, preparing it is easy, quick, and immediately usable.

    The right proportions for shining floors

    To create your homemade cleaning mixture, just gather:

    • 1 liter of warm water
    • 250 ml of white vinegar

    Following these proportions guarantees an optimal result without risk for your surfaces.

    Want a pleasant scent? A few drops of lavender or eucalyptus essential oil will delicately fragrance your home while boosting antibacterial properties. Remember to regularly renew your preparation to maintain its effectiveness.

    How to efficiently apply your vinegar solution on the floors?

    Even though your homemade preparation is effective, it’s necessary to follow a proper method to achieve perfect cleanliness.

    Simple steps for successful cleaning

    Here’s how to proceed in just a few minutes:

    • Always start by sweeping or vacuuming the surface to remove dust.
    • Dampen your mop or sponge with the vinegar mixture (never pour it directly on the floor).
    • Mop your floor using a figure-eight motion to clean the entire surface evenly.
    • Allow to air dry naturally—no need to rinse (and ventilate for a few minutes if the smell is too strong).

    Read also:  When should you plant your roses? Here are the ideal times and those to avoid at all costs!

    Which surfaces is this method suitable for?

    This simple and natural technique works wonders on most sturdy surfaces like tiles, polished concrete, or PVC flooring.

    However, be cautious with delicate surfaces such as marble or solid wood floors. If you still want to use it, make sure to significantly increase the dilution to avoid any damage.

    White vinegar, a versatile essential in your home

    Be aware that this precious ally presents many more benefits. Why limit yourself to just cleaning your floors?

    Some complementary tips to try at home

    Try it for:

    • Easy deodorizing of rooms in the house.
    • Simple maintenance of your frequently used appliances (washing machine, coffee maker, kettle, etc.).
    • Effective eradication of weeds in the garden.
    • Advantageously replacing store-bought fabric softener in your washing machine.

    Have you ever tried cleaning your floors with white vinegar? What do you think of this natural method? What other homemade products do you use for eco-friendly cleaning daily? Share your experiences in the comments below!

  • Your lawn will be beautiful this summer… only if you take this step in the spring

    Your lawn will be beautiful this summer… only if you take this step in the spring

    As winter comes to an end, does your lawn look sadly unhealthy? This is quite common: after months of cold, constant moisture, and shorter days, grass often shows signs of yellowing, sparse patches, or compacted soil.

    But here’s the good news: come spring, you can help your lawn regain its vigor without significant cost or complicated efforts.

    Why Your Lawn Needs a Boost in Spring?

    Each winter, your lawn goes into dormancy. During this period of rest, it hardly grows, and its roots severely limit their development. The result? In spring, your lawn is severely lacking in nutrients and struggles to bounce back vigorously.

    Without some assistance from you, it may sadly be “eaten” by moss or overrun by weeds. Therefore, it’s in your best interest to boost your lawn starting in mid-March with a simple and sustainable product: coffee grounds.

    Coffee Grounds: A Valuable, Natural Ally for Your Lawn

    Who would have guessed that this brown residue you throw away each morning could bring so much benefit to your garden? Coffee grounds have remarkable properties. Thanks to their nitrogen content, they actively stimulate growth and the greening of the foliage. Additionally, they contain other beneficial nutrients like phosphorus, trace elements, potassium, and the essential magnesium.

    Its main advantage? Unlike chemical fertilizers, it acts gently without harming or burning your delicate roots. It even enhances soil quality by attracting beneficial organisms like earthworms and good bacteria. This helps prevent the formation of hard crusts that block the absorption of rainwater or watering. Nice, right?

    Bonus tip: Its finely granulated texture will slightly repel certain harmful insects, another great reason not to throw it out!

    How to Properly Use Coffee Grounds on Your Lawn?

    To fully benefit from coffee grounds, it’s important not to spread them haphazardly. The key to significant improvement lies in their targeted, moderate, and regular application from early March to late April.

    Here’s how to optimize the effects of coffee grounds:

    • Spread the dry or slightly damp grounds in a thin layer over the entire area to be treated.
    • Avoid creating thick clumps that may mold or obstruct the soil.
    • Gently incorporate them into the top few centimeters of soil using a rake.
    • Lightly moisten afterward, especially if your soil seems dry, which will facilitate their natural decomposition.

    If your lawn is a bit sparse, combine this method with light overseeding or even a slight addition of potting soil. Repeat the application of coffee grounds every 15 to 20 days in spring, possibly alternating with very fine compost or gentle organic fertilizers.

    Why Recycling Coffee Grounds is Beneficial This Season?

    This daily waste, often underutilized, becomes a free, effective, and sustainable resource for replenishing your lawn with thickness and a vibrant green hue as the first sunny days arrive.

    Choosing this method also saves you from buying specialized fertilizers, which can be poorly dosed or expensive. A simple action you can adopt now for a healthy lawn!


    Have you tried using coffee grounds in your garden? What do you think of this natural and ecological tip? Feel free to share your experience in the comments below. We can’t wait to hear your own tips and creative uses!

  • She survives without watering, loves heat, and attracts butterflies: here is the plant to adopt in 2025.

    She survives without watering, loves heat, and attracts butterflies: here is the plant to adopt in 2025.

    With increasingly hot summers, gardeners must choose drought-resistant plants. Have you considered Gaura lindheimeri? This perennial, native to the arid regions of the southern United States, thrives beautifully in our gardens.

    It retains stunning blooms without frequent watering and also attracts a multitude of butterflies. However, to fully enjoy this hardy plant, it’s essential to know exactly when and how to plant it.

    Why choose gaura in a contemporary garden?

    To start, gaura has essential qualities for modern gardens where minimal maintenance meets aesthetics.

    Low-maintenance, it perfectly adapts to dry areas where water is limited, becoming a valuable ally for busy or beginner gardeners.

    An impressive adaptability to drought

    It is in the arid conditions of Texas and Louisiana that gaura developed its exceptional resilience. Its standout feature is its deep taproot system, capable of reaching over a meter deep to access water. By the second season, frequent watering becomes unnecessary: just a few rare applications of water will suffice even in the height of summer.

    Also read:  Photinia: When and how to plant it for quick growth?

    Here are the features that allow gaura to easily withstand drought:

    • Long roots that reach deep into the soil.
    • Fuzzy leaves that significantly reduce evaporation.
    • Slower growth during the driest periods.

    Generous blossoms that irresistibly attract butterflies

    The charming display of gaura flowers begins in early summer and continues until the first frosts. With graceful blooms that sway gently in the wind, this plant adds a unique beauty to flowerbeds. Gardeners adore gaura, and so do butterflies: no other perennial attracts them as much, thanks to its abundant nectar-rich flowers.

    Three must-try varieties include:

    • ‘Whirling Butterflies’, with remarkably light white flowers.
    • ‘Siskiyou Pink’, exhibiting a lovely pink hue leaning towards fuchsia.
    • ‘Passionate Blush’, featuring decorative bicolored white and pink blooms.

    Gaura, to be planted in spring for assured growth

    Want your gaura to endure the summer heat well? Plant it in spring, ideally between March and May, depending on your region. During this time, before the scorching heat sets in, it will develop its roots steadily, allowing it to thrive during summer.

    Here are the best practices for successful planting:

    • Dig a wide hole, twice the size of the root ball.
    • Use a well-draining mixture of soil and sand to prevent water from pooling.
    • Set the gaura with the crown level with the soil.
    • Fill in, lightly compact, and water generously to promote root establishment.

    Simple steps for easy maintenance

    Short on time for gardening? Gaura has the incredible advantage of requiring minimal upkeep. Here are the key points to remember:

    • Water rarely: once established, only water occasionally during very dry periods (maximum every two weeks).
    • Fertilize sparingly: if your soil is moderately poor, avoid excessive fertilizer that promotes vegetative growth at the expense of flowering.
    • Simply prune: cut back stems to a few centimeters above the ground each spring, and remove faded flowers in summer to extend blooming.

    Also read:  This majestic tree with blue-purple flowers will transform your garden into a true work of art!

    What associations in the garden to enhance your gauras?

    In flowerbeds, consider pairing your gaura with other robust, low-water perennials:

    • Russian sages (Perovskia) with their purple spikes.
    • Echinacea to attract even more butterflies and insects.
    • Graceful grasses like angel’s hair (Stipa) or blue fescue (Festuca).

    Want to multiply your gaura easily? Here’s how:

    Here are three simple techniques to multiply your favorite plant:

    • By clump division: divide the clumps in early spring (every 4 or 5 years).
    • By cuttings: take unflowered stems in early summer; the recovery is quick and effective.
    • By sowing: collect seeds at the end of the season or sow directly in spring.

    Avoid the rare problems encountered with gaura

    There are few issues regarding diseases or pests. Just be vigilant about these points:

    • Absolutely avoid water accumulation at the base of the plant.
    • For any potential powdery mildew (white fuzz on leaves), simply remove the affected parts.
    • Aphids? They’re usually managed naturally by predators.

    For winter, just protect the base with mulch in colder regions, but limit moisture.

    Perfect varieties for every space

    Depending on their size, several categories of varieties exist:

    • For the back of a border: ‘Whirling Butterflies’, ‘Siskiyou Pink’, or the very decorative ‘Passionate Rainbow’.
    • For borders or pots: choose compact varieties like ‘Crimson Butterflies’ or ‘Short Form’.

    Have you tried gaura in your garden? What do you think of this hardy perennial? What has been your experience with its planting and maintenance? Feel free to share your thoughts in the comments below!

  • Want to dress up a wall or a pergola? This climbing plant beautifies your support in no time.

    Want to dress up a wall or a pergola? This climbing plant beautifies your support in no time.

    April is the perfect month to add a new dimension to your outdoor spaces with clematis. Have you thought about beautifying your worn-out walls or infusing some poetry into your pergola? These stunning climbing plants have the ability to completely transform monotonous environments into real botanical paintings.

    Why adopt clematis as a climbing plant?

    Clematis is a highly appreciated climbing plant, known for its aesthetic appeal and adaptability to various environments. Whether you live in a city apartment or a country house, you’re sure to find a variety that suits your needs.

    Amazing and elegant varieties

    With nearly 300 species available, clematis can truly meet all your outdoor landscaping desires. Depending on the variety, it produces flowers ranging from the large blooms of ‘Nelly Moser’ to the small fragrant clusters of Clematis montana.

    If you choose your clematis wisely, you can enjoy flowers from March to October. By playing with bloom times, you can appreciate the vibrant colors of these climbing plants almost all year round.

    Practical and versatile: they climb anywhere!

    Clematis is resourceful when it comes to finding a support to showcase its beauty. With its delicate tendrils, it climbs easily, as long as you provide an appropriate support:

    • Walls equipped with cables, mesh, or trellises
    • Pergolas to elegantly shade a terrace
    • Decorative trellises perfect for small spaces
    • Trees or shrubs serving as natural and aesthetic supports
    • Garden arches to welcome your guests beautifully

    Some varieties can climb up to 10 meters, while others have a more compact growth, ideal for balconies.

    How to choose the right clematis for your needs?

    Each variety of clematis has its own care requirements and blooming period.

    Early blooming clematis

    Looking for flowers as early as spring? Choose:

    • Clematis montana, bright and fragrant
    • Clematis alpina, with lovely bell-shaped flowers
    • Clematis armandii, evergreen for year-round beauty

    Hybrid clematis with large flowers

    If you want to impress with large flowers, these spectacular hybrids bloom in two waves, in May-June and then late summer.

    • ‘Nelly Moser’, a soft pink striped with bright pink
    • ‘The President’, with remarkable deep blue flowers
    • ‘Duchess of Edinburgh’, known for its elegant white double blooms

    Late blooming clematis

    These varieties bloom between July and October. Keep an eye out for:

    • Clematis viticella, hardy and abundantly flowering
    • ‘Étoile Violette’, generous with its dark purple flowers
    • Clematis tangutica, attractive with its bright yellow flowers

    April: key steps to plant your clematis

    Take advantage of the mild temperatures in April to plant your clematis successfully. Have you chosen your variety? Here’s how to ensure a good planting:

    Choose the right location

    Keep these key tips in mind for a happy clematis:

    • Sun on the head, shade on the roots: Plan to provide shade at the roots, perhaps with hostas
    • Well-drained and rich soil, slightly alkaline ideally.

    Essential steps for planting

    Here’s how to proceed step by step:

    • Dig a hole about 40 cm and enrich it with compost and possibly lime.
    • Install your support before planting the clematis.
    • Plant by slightly burying the base (an additional 5-10 cm) to encourage development.
    • Water generously and protect the base with mulch (flat stones or organic mulch).

    Caring for your clematis: simple gestures for beautiful blooming

    No worries, clematis requires relatively little maintenance, but a few targeted actions will make all the difference.

    Watering and nutrition

    Be sure to water regularly during the first two years, and then only in cases of drought. Adding compost or organic fertilizer in spring will keep your plant in excellent health.

    Pruning suitable for each group

    Follow these pruning guidelines based on your clematis type:

    • Early bloomers: lightly prune after flowering.
    • Hybrids: remove dead stems and trim back after winter.
    • Late bloomers: perform a severe pruning in February-March.

    Harmoniously associate clematis in your garden

    Combining a clematis with other plants is a fantastic idea for enhancing your outdoor spaces:

    • Climbing roses and honeysuckles add complimentary fragrances and colors.
    • Hostas or perennial geraniums protect the clematis roots while beautifully decorating its base.

    Have you ever considered incorporating clematis into your outdoor renovation projects? Which variety is your favorite? Share your experiences and practical tips in the comments below. We’d love to exchange ideas with you about these wonderful climbing plants!

  • Forget straw and bark: This Mulch Used by Professionals Transforms Your Garden (and No One Talks About It)

    Forget straw and bark: This Mulch Used by Professionals Transforms Your Garden (and No One Talks About It)

    Did you know that professional gardeners have a well-kept secret for caring for their plants? This secret can be summed up in a few words: flax mulch! Little known to the general public, it could completely transform your gardening habits.

    What is its advantage compared to traditional straw or bark? Let’s explore together this natural product with numerous benefits.

    An ecological mulch produced locally

    Made from flax shives, these tiny fibers derived from the flax processing in the textile industry, flax mulch is a 100% natural, biodegradable, and ecological material. What was once a byproduct turned into waste is now a true treasure for your garden.

    Flax is primarily grown in France, especially in Normandy, Hauts-de-France, and Brittany. By choosing this mulch, you are opting for a sustainable choice while reducing your environmental impact. That’s great news for our planet, right?

    Suitable for all types of plantations

    The greatest strength of flax mulch is undoubtedly its versatility. Whether you are passionate about your vegetable garden, love flowers, proudly own shrubs, or enjoy container gardening on your terrace, this mulch is your ally.

    Easy to handle due to its lightweight nature, this mulch laid in a layer of 5 to 8 centimeters forms a true cover over the soil. A uniform mulch that retains moisture, thus reducing the need for watering and preventing the growth of weeds.

    • Less weeding
    • Soil that remains aerated
    • Excellent moisture balance
    Read also: What is the Growth Rate of a Paulownia?

    Additionally, flax compresses without creating compaction. Unlike coarser materials, it allows air and water to circulate, preserving root health.

    Your ally against dry periods

    With increasingly warm and dry summers, protecting your plants has become a priority. Thanks to its fine structure and light color that reflects light, flax mulch significantly reduces water evaporation from the soil by up to 50%.

    It also regulates the temperature around the roots, providing welcomed coolness during heatwaves. For sensitive plants like strawberries, young lettuces, or spinach, this is a significant advantage.

    Preserve biodiversity under your feet

    Unlike plastic tarps or some overly compact mulches, flax mulch offers real comfort for all the life that thrives beneath your feet.

    It quickly becomes a genuine resource for the microfauna: earthworms, insects, microorganisms, and fungi happily settle in, ensuring a living and well-nourished soil.

    As it decomposes, this natural material gradually enriches the soil, increasing its humus content. The result? Better-rooted plants that can absorb nutrients more efficiently.

    Aesthetic appeal for your garden

    If you care about the design of your garden and wish to maintain a certain elegance, good news: this discreet and light-colored mulch integrates easily into any decor. Unlike the cluttered effect of dark bark or fermented grass clippings, flax mulch casts a soft light under your plants.

    Read also: When and How to Plant Rhododendrons: Tips for a Beautifully Colorful Garden!

    Another important advantage: it does not emit unpleasant odors as it decomposes. It neither attracts unwanted insects nor pests. You can use it safely near a terrace, a children’s play area, or alongside your home.

    How to properly use lin mulch?

    To fully enjoy the benefits of flax mulch, a few simple precautions should be taken:

    • Always install your mulch on previously weeded and slightly damp soil.
    • A 5 to 8 cm thickness is sufficient for good effectiveness.
    • To stimulate biological activity, don’t hesitate to combine it with other organic mulches like grass clippings or fallen leaves.

    When used wisely, flax will quickly become essential in your garden.


    And what about you, did you already know about this fantastic flax mulch? Have you tried incorporating it into your outdoor space? Would you be willing to adopt it? Feel free to share your experience in the comments; we can’t wait to hear what you think! Get typing!

  • Tired of weeding? This ground cover plant to sow in April does all the work for you!

    Tired of weeding? This ground cover plant to sow in April does all the work for you!

    As the beautiful days arrive, do you want to give your garden a fresh look while limiting weeds and retaining soil moisture? Ground ivy might just be the perfect solution, and April is the ideal time to install it in your garden. Let’s explore how this plant, with its numerous benefits, can quickly transform your green spaces.

    Discover ground ivy: presentation of an astonishing plant

    Don’t be deceived by its name: ground ivy is not related to climbing ivy. Also known as glechoma, it belongs to the Lamiaceae family and is characterized by its small, round leaves with serrated edges and its subtle violet blooms in spring.

    Relatively low-growing, this plant reaches a maximum height of 5 to 15 centimeters. Its vigorous growth allows it to quickly cover the ground with creeping stems that root upon contact with the soil. A single plant planted in April can easily cover up to 1 square meter in its first season, creating a thick and uniform carpet.

    Here are some key botanical characteristics:

    • Botanical family: Lamiaceae
    • Average height: 5 to 15 cm
    • Flowering: small violet flowers from April to June
    • Preferred exposure: half-shade to shade
    • Hardiness: can easily withstand temperatures down to -20°C

    A small bonus: when you crush its leaves, you’ll enjoy a fresh, slightly mentholated scent that is very pleasant.

    Why is April perfect for planting ground ivy?

    You may be wondering why to choose April specifically. Simply put, this month brings together all the optimal conditions necessary for the healthy development of this plant:

    • Gentle temperatures without severe frosts
    • Sufficiently moist soil from spring rains
    • Slowly warming soil, perfectly stimulating root growth

    By installing in April, ground ivy will have ample time to establish itself before the summer heat arrives. Its root system can fully develop, increasing its resilience during dry periods.

    What are the real benefits of ground ivy as ground cover?

    An excellent solution against weeds

    The main advantage: by forming a dense vegetation carpet, ground ivy effectively prevents weeds from growing.

    Its thick foliage limits light at the soil level, and its shallow roots occupy the top few centimeters of the ground, thus preventing weed seeds from germinating. What gardener wouldn’t dream of simplifying the constant battle against weeds?

    Naturally maintain moisture

    Ground ivy acts just like a natural plant mulch. It significantly reduces evaporation and thus keeps your soil moist for longer.

    In practical terms, this means less watering, reduced water consumption, and more freedom for you during the summer months.

    A natural barrier against erosion and a rich soil

    Thanks to its dense mat, ground ivy protects the soil from erosion during heavy rains. It keeps the ground loose, preventing excessive soil compaction.

    As its leaves die and decompose, they also enhance the organic matter in the soil and stimulate beneficial microbial life.

    Easily plant and cultivate your ground ivy

    Choosing the ideal location

    Choose a semi-shaded to shaded location, ideally under trees, near walls, or in flowerbeds that are not too exposed to sunlight:

    • Wooded areas and light forests
    • Difficult-to-reach areas such as slopes or borders
    • Base of trees and shaded areas by walls or hedges

    Practical tips for planting

    Follow these simple steps for successful planting:

    1. Carefully weed the chosen area and lightly loosen the soil.
    2. Add a bit of compost if your soil is poor.
    3. Space your plants 30 to 40 cm apart.
    4. Water generously after planting.
    5. Lightly mulch to limit competition from weeds in the first few weeks.

    Ground ivy established by cuttings from existing plants roots particularly quickly. It’s clearly the winning option for swift coverage.

    Smartly associating ground ivy with other vegetation

    Ground ivy harmoniously associates with certain plants to create complementary vegetated spaces. For example:

    • As ground cover under shrubs like hydrangeas or rhododendrons.
    • At the base of small trees such as Japanese maples.
    • Combined with spring-flowering perennials like hellebores or daffodil bulbs that will easily come through its foliage.

    Some necessary precautions for proper management of ground ivy

    This plant, with its vigorous growth, could become invasive in some situations. Anticipate this risk by installing limiting borders and periodically controlling its spread. Also, avoid planting near lawns to prevent any unintentional spreading.

    For regions where this species is considered invasive, consult with a local gardening center before planting.


    Have you ever tried ground ivy in your garden? What are your thoughts? Share your feedback with us in the comments below! You might know of other effective ground covers that you would recommend? We eagerly await your testimonials and practical advice!

  • Tired of rough towels? This little-known tip makes them incredibly soft (without fabric softener).

    Tired of rough towels? This little-known tip makes them incredibly soft (without fabric softener).

    Are your towels coming out of the washing machine rough instead of soft and fluffy? Don’t worry, this problem is common, but fortunately, it’s easy to fix. With a few simple actions and perhaps some tips you didn’t know about, you can quickly have perfectly soft and pleasant-to-the-touch linens. Discover everything you need to know to say goodbye to rough towels for good.

    Opt for natural drying to preserve your towels

    The simplest solution to avoid having rough towels after washing? Hang them out to dry, preferably outdoors!

    Whether draped over a clothesline outside or spread over a drying rack on your balcony, your towels will benefit from pleasant natural ventilation and beneficial sunlight exposure.

    This method not only prevents moisture but also naturally eliminates bad odors. The result? Fresh and pleasant towels to use.

    Your towels drying in the dryer? Try drying balls!

    If you prefer drying them in the machine, adopt a simple habit: slip a few specific drying balls into the drum. These handy accessories allow air to circulate better between the fibers, naturally restoring their softness.

    Read also:  Moles in your garden? 4 natural tips to get rid of them quickly (and for good)

    If you don’t have these balls on hand, don’t worry. There’s an easy alternative: once dry, simply rub your towels together to loosen the fibers and restore their fluffiness.

    Choose your detergent carefully

    Did you know that rough towels are not only a result of drying? Your choice of laundry products also plays a significant role.

    Two natural allies can greatly enhance the softness of your textiles: white vinegar and baking soda.

    Incorporate white vinegar into your washing routine

    White vinegar is far more effective than you might think. To use it, simply:

    • Pour a cup of white vinegar instead of your usual detergent and run a hot empty wash cycle.
    • Then, run a regular cycle with your usual detergent.

    With this method, stubborn soap residues will be eliminated, freeing the fibers of your towels from their annoying rigidity.

    Try using baking soda instead of chemical fabric softeners

    Another simple and natural tip: just add a half cup of baking soda directly to your wash cycle.

    This product not only effectively neutralizes bad odors but also helps to soften fabrics. An eco-friendly and effective alternative to industrial softeners.

    Wind and sun: the best allies for your towels

    Why not fully enjoy the free benefits offered by nature? Wind and sunlight provide a perfect combination for restoring softness to your towels.

    Read also:  Here’s how to easily clean your dryer to lower energy bills and extend its lifespan!

    While the sun naturally eliminates bad odors and brightens colors, the breeze helps revive the fibers and their fluffy texture.

    This simple solution will revitalize your towels even when they’ve lost their original brightness over time.

    Surprising yet effective: the tennis ball trick

    Here’s one last particularly clever tip for dryer users: simply place one or two clean tennis balls in the drum of your appliance along with your towels. While the dryer runs, these balls will bounce continuously against the fabrics, preventing the towels from being crushed or compacted.

    The result? Fluffy, airy towels with unparalleled softness that are especially pleasant to use.

    By regularly applying these easy-to-implement tips, your towels will remain impeccably soft for a long time, increasing their lifespan and your everyday comfort.


    And you, how do you take care of your towels? Have you tried any of these tips or do you know of others? Share your experiences and advice by leaving a comment below. We’d love to hear your thoughts!

  • Say goodbye to the hassle of cleaning your blinds: this super simple grandma’s tip will amaze you

    Say goodbye to the hassle of cleaning your blinds: this super simple grandma’s tip will amaze you

    Do you have blinds at home? While they are very practical for controlling light, maintaining privacy, and regulating indoor temperature, cleaning them often ranks low on the list of chores we prefer to forget.

    However, a simple method found among grandmother’s tips will change the way you view cleaning your blinds. Have you ever tried cleaning with a sock? A surprising and highly effective technique awaits you!

    Why use a sock to dust your blinds?

    The next time you sort through your sock drawer, don’t immediately toss out the worn ones. They can become a true cleaning tool, perfect for easily wiping down all the slats of your blinds.

    This technique is not only cost-effective, but it also avoids irritating chemical products and provides a quick clean with impeccable results. So, why not try a simple, eco-friendly, and incredibly effective solution today?

    Here’s what you’ll need:

    • An old cotton sock. Soft, absorbent, and lint-free, it will be perfect for this cleaning task.
    • White vinegar, ideal for removing dust and stubborn stains.
    • Water, to dilute the vinegar and gently protect the materials.
    • An empty spray bottle, essential for evenly distributing the solution.
    • A step stool or small ladder, especially useful if your blinds are hard to reach.

    Do you have everything on hand? Great! Let’s quickly move on to the preparations.

    Easily prepare your natural cleaning mixture

    In your spray bottle, mix equal parts of water and white vinegar. It’s that simple! If the strong smell of vinegar bothers you, here’s an easy tip: just add a small drop of dish soap. This homemade mixture is suitable for all types of blinds and easily tackles dust, dirt, and smudges.

    How to clean your blinds quickly and effectively? Follow these simple steps

    Now it’s time for the fun part:

    • Put the sock on your hand, just like a glove. The more snug it fits, the more effective the cleaning will be.
    • Lightly spray your mixture onto the sock or directly onto the slats of the blinds. Be careful not to soak them, especially if they are made of wood.
    • Wipe each slat by gently passing the socked hand over it, from top to bottom. If a stain persists, gently rub it with a slightly dampened sock.
    • Change the sock as soon as it gets too dirty to continue cleaning effectively.
    • Finally, use a clean, dry sock to remove any lingering moisture and prevent streaks.

    Once you’re done cleaning, you’ll see how this simple method can transform a tedious chore into a light and enjoyable task!

    How often should your blinds be cleaned?

    You might be wondering how often to repeat this task. The secret lies in maintaining a certain regularity. Ideally, cleaning every three to four months is recommended.

    If your blinds are particularly prone to dust (like windows overlooking a busy street or close to a kitchen), feel free to increase the cleaning frequency. Also, make sure to quickly repair any deteriorated slats to avoid having to replace the entire mechanism!

    Affordable and environmentally friendly: adopt this method!

    This sock trick, simple yet effective, reminds us how much we can still benefit from traditional methods today. Not only is it eco-friendly and budget-friendly, but it also gives your worn socks a second life and transforms a tedious task into a truly enjoyable experience!

    Try it out without delay, and you’ll see just how quick and fun cleaning your blinds can be while restoring their original beauty.


    Have you heard about or tried the sock trick for cleaning your blinds? Your turn! Do you have any remarkable tips handed down from your parents or grandparents? Feel free to share your experiences and thoughts just below in the comments; we can’t wait to hear from you!

  • Dry, hard soil ? Here is the ultra-effective method to make it flexible in no time

    Dry, hard soil ? Here is the ultra-effective method to make it flexible in no time

    Is your soil as hard as concrete, dry, and nearly impossible to work with? Don’t worry, the situation isn’t hopeless. There’s a natural and quick approach that can help you achieve soft, rich, and easily cultivable soil in just a few days.

    It’s often mistakenly believed that only heavy mechanical work can save compacted soil. However, there’s a solution just as effective, but much simpler, within reach.

    Discovering false sowing: a clever technique to rejuvenate your soil

    If your garden suffers from clay soil or periods of drought, you’ve likely noticed how challenging it becomes to grow anything. Without intervention, the development of plants stagnates and the soil’s microbial life gradually disappears. This is where false sowing comes into play.

    False sowing involves preparing the soil just as you would for traditional sowings, but without actually planting anything. What’s the point, you might ask? It triggers the germination of dormant seeds in the soil, mainly weeds, allowing you to eliminate them before they multiply. But that’s not all!

    By watering adequately after this false sowing, you promote deep moisture in the soil. This process immediately stimulates the biological activity of the soil, fueled by ideal humidity.

    How to effectively implement false sowing at home?

    To successfully apply this technique with ease, here are the essential steps to follow:

    • Shallow tilling of the soil: Start by gently breaking up the hard surface crust to allow water to penetrate deep.
    • Generous watering: Provide a generous amount of water to keep the soil moist, promoting rapid germination of unwanted seeds and reviving soil microorganisms.
    • Quick removal: As soon as the young shoots of weeds appear, remove them manually or with a hoe, avoiding any chance for the weeds to take over your space.

    Pairing false sowing with fine, moist mulch for optimal results

    After performing false sowing, it’s crucial to complement your work with a fine mulch, like a light layer of mowed grass or well-rotted compost. This type of mulch offers immediate benefits:

    • It acts as a protective cover, preventing rapid evaporation of water from the soil.
    • As it decomposes gradually, it permanently enriches the soil while nourishing earthworms and other beneficial microorganisms.

    In just a few days, you will notice a significant improvement in the soil structure. The once hard and difficult-to-work land will magically transform into a fertile substrate, perfect for your plants.

    The benefits of adopting false sowing and humid mulch

    It’s no coincidence that this natural technique convinces many gardeners who care about preserving the environment while achieving optimal crop yields. It represents a true alternative to heavy mechanical processes, which are often costly and harmful in the long run to the natural balance of the soil.

    Here’s why this practice is ideal if you’re looking for a natural and respectful solution:

    • It constitutes an ecological and sustainable solution, avoiding excessive use of chemical inputs.
    • It is particularly recommended in spring or autumn, before planting root vegetables or sowing green manure.
    • It’s also a proven method for facing frequent drought periods, thanks to the hydrating and protective power of humid mulch.

    Preventing negative consequences of droughts through false sowing and mulch

    Do you live in a region where drought is common? Know that this method proves particularly useful. The humid mulch effectively retains water, thereby reducing the need for intensive watering.

    Furthermore, false sowing facilitates water access for the roots by improving the soil’s porosity and drainage. Your plants maintain good development conditions, even under prolonged water restrictions.


    And you, were you already familiar with the technique of false sowing? Have you tried it in your own garden? If so, share your feedback in the comments! If not, are you tempted by this simple and natural method to enhance your soil? We look forward to your thoughts!