Blog

  • 5 Grandmother Tips for a Sparkling Induction Cooktop (and Effortless)

    5 Grandmother Tips for a Sparkling Induction Cooktop (and Effortless)

    Do you enjoy using a glass-ceramic cooktop but find yourself quickly discouraged by stubborn stains? Baked-on spots, cooking splatters, limescale deposits… these nuisances can seem difficult to tackle. Here are some natural and eco-friendly solutions for cleaning your cooktop easily while maintaining its shine and pristine condition.

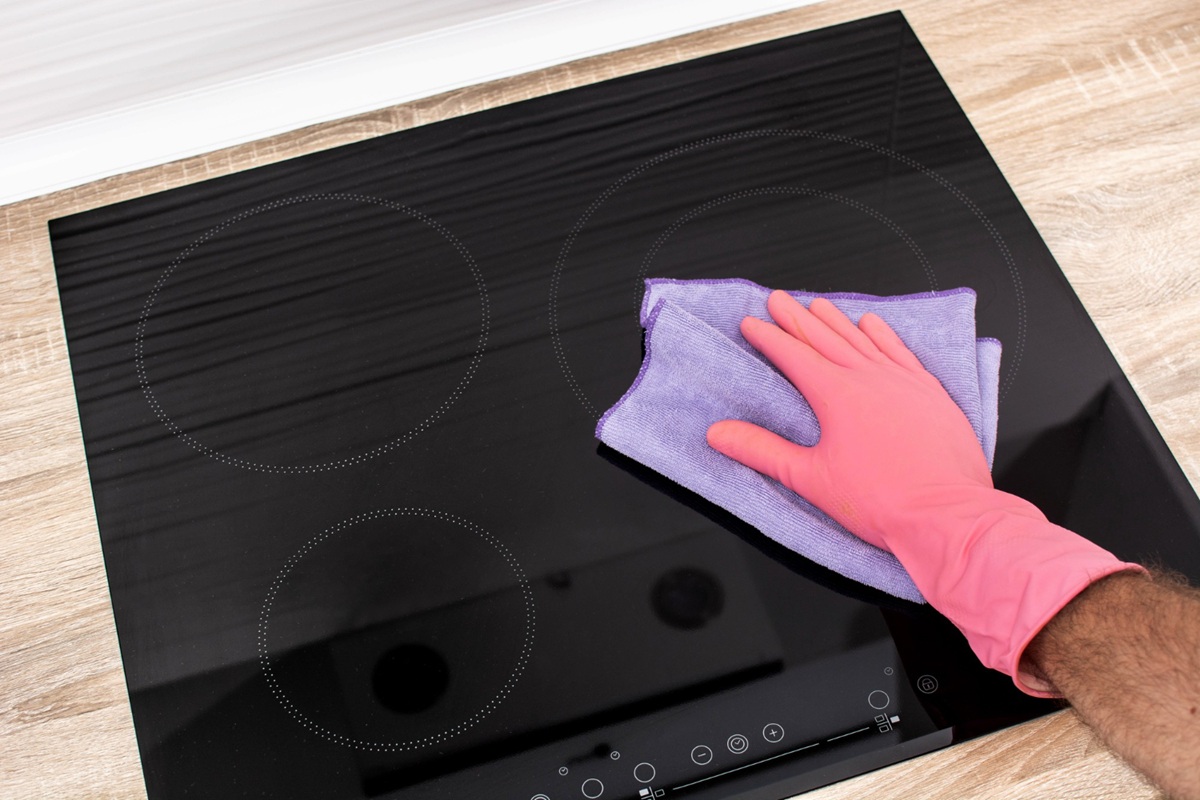
    1. Keep your cooktop clean with black soap

    No need for harsh chemicals to maintain your cooktop after each use. Liquid black soap, mild and completely natural, works wonders on a daily basis. A small amount on a moistened sponge with warm water is more than enough to remove cooking residues.

    Wipe the sponge over the warm surface of the cooktop. In just a few strokes, the splatters disappear. To finish, a dry microfiber cloth prevents limescale marks from forming.

    Black soap deeply degreases while respecting the glass surface. This simple act of regular maintenance helps keep your cooktop spotless without effort or aggressive products.

    2. Bring back the shine with white vinegar

    The famous white vinegar is also one of your best allies against those pesky deposits left by hard water or persistent stains.

    Use it as follows:

    • Mix an equal amount of water and white vinegar in a spray bottle.
    • Spray over the entire surface of the glass-ceramic cooktop.
    • Let it sit for 2 to 3 minutes, then wipe down with a clean cloth.

    Thanks to its natural descaling and disinfecting properties, this is an ideal solution for perfect kitchen hygiene.

    3. Lemon for the most stubborn stains

    Did you know that lemon is an excellent natural cleaner? The acidity of this fruit effectively breaks down tenacious dirt like carbonized residues.

    Here’s how to use it:

    • Simply cut a fresh lemon in half.
    • Rub it directly over the ingrained stains.
    • Let it sit for a few minutes, then wipe with a soft sponge.

    This economical, practical, and eco-friendly tip helps you eliminate even the oldest stains without scratching.

    4. Choose clay stone for deep cleaning

    If some stains persist, try the well-known effectiveness of natural clay stone. This eco-friendly product has a slight abrasive action that cleans without damaging the surface. Here’s how to proceed:

    Simply take a bit of clay stone with a damp sponge and gently apply it in circular motions on your cooktop.

    You will achieve effective and long-lasting cleaning because the clay stone also leaves a protective film that makes future cleanings easier.

    5. Whiting for a breathtaking shine

    For a perfect finish and a stunning shine, you will definitely want to try whiting. This fine, natural limestone powder ensures impeccable results on your glass-ceramic cooktop.

    Mix it with a little water to form a slightly thick paste that you can apply to the surface. Gently rub with a clean cloth, then rinse with clear water. A brilliant effect is guaranteed!


    What about you? Which natural tip do you regularly use to maintain your glass-ceramic cooktop? Have you tried any of these eco-friendly solutions? Feel free to share your experiences in the comments! Your advice will undoubtedly be very helpful to the community.

  • Forget the pressure washer: this grandmother’s trick makes your wood shine in no time

    Forget the pressure washer: this grandmother’s trick makes your wood shine in no time

    After a harsh winter, your wooden terrace likely appears dull and aged. Dirt accumulates, the weather takes its toll, and you’re left with an outdoor space that has lost its original charm.

    Should you resort to using a pressure washer? Absolutely not! Today, you will learn how to restore the beauty of your wooden terrace using a gentle and natural method.

    Why Abandon The Pressure Washer For Wood?

    You may be tempted by the quick solution of a pressure washer. After all, it seems practical and effective, right?

    Think again: using a device like a pressure washer can, in fact, damage your terrace. The powerful water jet will lift the wood fibers, causing splinters and weakening the material. Even worse, the aggressive stream accelerates the wear of your terrace and reduces its lifespan.

    So, how can you clean effectively without risking damage to the wood? Follow the guide.

    Use Black Soap For A Flawless Terrace

    Here’s the undeniable star of eco-friendly cleaning: black soap. Naturally gentle and nourishing for wood, it provides deep cleaning without harming your planks.

    Here Is How To Use It:

    • Mix 10 tablespoons of liquid black soap with 10 liters of hot water in a bucket.
    • Dip your broom-brush into the mixture and clean by always following the direction of the wood grain.
    • Rinse</strong thoroughly with clear water afterwards.
    • Let it dry naturally, choosing a nice sunny day.

    This tip is simple as can be, and you will love the results.

    How To Remove Persistent Stains With Baking Soda?

    Some stains may persist despite the initial cleaning with black soap? No worries, baking soda will quickly tackle tougher stains thanks to its gentle abrasive action.

    • Sparingly sprinkle baking soda on the stained areas.
    • Gently scrub with a damp brush.
    • Rinse immediately after to avoid white marks.

    Tip to remember: this method is perfect for both natural stone terraces and wood.

    Avoid Calcareous Deposits With White Vinegar

    Noticed some whitish streaks on your terrace? It’s likely limescale! A simple mix of white vinegar and warm water will easily eliminate these deposits.

    Proceed as follows:

    • Mix white vinegar and warm water in equal parts.
    • Apply the solution with a soft sponge or cloth.
    • Let it sit for a few minutes, then rinse thoroughly.

    Just be cautious: avoid using white vinegar on materials sensitive to acidity, such as marble or certain natural stones.

    Very Dirty Terrace? Try Percarbonate Of Soda!

    Terraces that are particularly dirty or blackened require intensive cleaning. In this case, percarbonate of soda is a true lifesaver: it works deeply while being environmentally friendly.

    Here’s how to do it:

    • Dissolve one cup of percarbonate of soda in 10 liters of hot water.
    • Spread the solution over your terrace with a broom-brush.
    • Let it sit for 15 to 20 minutes, then scrub again to dislodge all the dirt.
    • Finish with a thorough rinse with clear water and let it dry.

    Guaranteed results: your terrace will regain its original appearance in no time.

    Properly Maintain Your Wooden Terrace: Some Practical Tips

    Did you know that preventing dirt buildup will save you time during major seasonal cleanings? Here are some good habits to adopt to simplify your terrace maintenance:

    • Regularly sweep to remove dead leaves and dust.
    • Perform a complete cleaning twice a year, ideally in spring and fall.
    • Protect the wood by applying a saturator after each major cleaning. This nourishes the material, revives its colors, and protects it from UV rays and moisture.

    By adopting these simple and effective gestures, you’ll keep your terrace beautiful and durable year after year.


    Have you tried these natural methods to clean your wooden terrace? Which one works best for you? Share your experiences in the comments below! We’re interested in your opinion.

  • Stop wasting: 5 incredible ideas to give a second life to your corks

    Stop wasting: 5 incredible ideas to give a second life to your corks

    Every time you uncork a bottle, you retrieve an often overlooked item: the cork. But do you know the full ecological potential of these ordinary objects in your garden?

    Durable and eco-friendly, your corks have many qualities that your garden will surely appreciate. So, instead of tossing them out, why not give them a second life? Here’s how to use this natural material to cultivate a garden that’s even more environmentally friendly.

    1. Offer a durable mulch to your garden

    Have you tried various types of mulch, but thought about using ground corks? Mulch made from cork effectively retains moisture, protects roots from temperature fluctuations, and slows down the growth of weeds.

    Creating your own cork mulch is simple:

    • Grind or finely cut the corks by hand or using a blender.
    • Layer them around your plants and shrubs.

    As it decomposes slowly, this mulch will also enrich your soil with organic matter. A straightforward and environmentally friendly solution!

    2. Construct a natural shelter to promote biodiversity

    Your garden needs natural allies to ward off certain harmful pests. Beneficial insects like ladybugs or solitary bees will appreciate shelters made from corks.

    Also read:
    Don’t throw away your old sponges: 6 brilliant ways to easily reuse them in the garden

    Here are some quick ways to encourage these beneficial guests:

    • Simply stack corks in an open wooden box.
    • Drill a few holes in each cork and incorporate them into a homemade insect hotel.

    A creative and useful way to naturally maintain the health of your garden.

    3. Lighten your potting mix effectively with cork

    Don’t let your plants suffer in overly compact soil. Instead, try using a lightweight potting mix enriched with recycled corks. To do this:

    • Cut your corks into small pieces.
    • Mix them directly into your regular potting mix.

    This solution will provide your plants with good drainage and better soil aeration. Your potted plants and hanging baskets will love it!

    4. Make your own ecological labels

    Plastic labels are out! Instead, opt for sustainable and creative solutions like plant labels made from cork.

    In just two minutes:

    • Stick each cork onto a wooden skewer.
    • Write the names using a waterproof marker.
    • Install your labels directly into your pots or garden bed.

    An effective, eco-friendly, and decorative way to easily identify all your plants.

    5. Protect your tools safely

    Have you ever suffered an accidental injury from the sharp tip of a pruning shears or hedge trimmer? Now, think about transforming your old corks into effective protection for your tools.

    Simply cover the blades and tips with a whole cork. Guaranteed safety for all your sharp tools!


    Have you tried any of these tips? Do you have personal techniques to reuse corks in your garden? We’re eager to hear all your ideas in the comments! Share your experiences below.

  • Why sugar is more effective than salt against ice (and you should adopt it now)

    Why sugar is more effective than salt against ice (and you should adopt it now)


    Winter brings its share of challenges, particularly ice that turns our paths and sidewalks into true skating rinks. Traditionally, salt has been the go-to ally for combating these slippery surfaces. However, a surprising and eco-friendly alternative deserves our attention: sugar. Here’s why you should consider using sugar instead of salt to prevent ice formation.

    The Limitations of Salt: A Solution with Harmful Consequences

    Salt, primarily composed of sodium chloride, is commonly used to melt ice by lowering the freezing point of water. However, its extensive use presents several drawbacks:

    • Environmental Impact: Salt can disrupt soil balance, affecting plant growth and contaminating groundwater. Additionally, it is corrosive to infrastructure, damaging concrete, metal, and vehicles.
    • Limited Effectiveness: In extremely cold weather, the effectiveness of salt significantly decreases, requiring increased quantities to achieve the same results.

    Sugar: A Natural and Environmentally Friendly Alternative

    Sugar, particularly sucrose, possesses antifreeze properties similar to those of salt. When dissolved in water, it also lowers the freezing point, thereby preventing ice formation. Here’s why sugar is an interesting option:

    • Less Corrosive: Unlike salt, sugar does not damage the surfaces it is applied to, thereby preserving the integrity of infrastructure.
    • Plant-Friendly: Sugar does not disrupt the chemical composition of the soil, preventing damage to plants and surrounding ecosystems.
    • Biodegradable: As an organic substance, sugar decomposes naturally without leaving harmful residues in the environment.

    How to Use Sugar to Prevent Ice?

    To take advantage of sugar’s benefits, here are some practical tips:

    1. Preventive Application: Before a snowfall or a significant drop in temperatures, spread a fine layer of sugar on surfaces likely to freeze. This will help prevent ice formation by lowering the freezing point of water.
    2. Curative Treatment: If ice is already present, you can dissolve sugar in warm water to create a sugary solution. Pour this solution onto the icy areas to speed up the melting process.
    3. Proper Dosage: It is important not to overload surfaces with sugar. A moderate amount is typically sufficient to prevent ice formation without leaving sticky residues.

    Precautions and Considerations

    While sugar is an eco-friendly alternative, it’s essential to keep certain aspects in mind:

    • Cost: Sugar may be more expensive than salt, especially for large areas. It’s advisable to use it judiciously on critical or high-risk zones.
    • Attraction of Pests: Sugar can attract unwanted insects or animals. To minimize this risk, ensure that you clean up residues after the ice has melted.
    • Sticky Effect: Excessive sugar application can make surfaces sticky once the ice has melted. Therefore, proper dosing and cleaning of treated areas, if necessary, is crucial.

    Complementary Alternatives to Sugar

    If using sugar is not feasible for you, other natural solutions exist to combat ice:

    • Wood Ash: Ash provides a non-slip surface and promotes ice melting due to its dark color, which absorbs heat. It is also beneficial for the soil as a natural fertilizer.
    • Sand or Gravel: These materials increase traction on icy surfaces without harming the environment. While they do not melt ice, they significantly reduce slip risks.
    • Wood Chips: Wood chips create a rough surface that enhances traction and are biodegradable, making them an eco-friendly option for preventing falls.

    In the face of the challenges posed by ice, it is essential to choose effective prevention methods while respecting our environment. Sugar thus emerges as a gentle and eco-friendly alternative to salt, offering a viable solution for keeping our paths and sidewalks safe during winter. By adopting natural approaches, we contribute to the preservation of our infrastructure, vegetation, and our planet.

  • Finished with dry chicken fillets using this foolproof chef’s trick to do at home

    Finished with dry chicken fillets using this foolproof chef’s trick to do at home


    There’s nothing more disappointing than biting into a perfectly golden chicken breast on the outside, only to find it dry and flavorless on the inside. Fortunately, this common issue has a straightforward and effective solution: a method embraced by many chefs and cooking enthusiasts that guarantees tender, juicy, and flavorful chicken breasts. Let’s uncover the secrets of this technique and the keys to perfect cooking.

    What Is Brining And Why Is It So Effective?

    This method involves soaking the chicken breast in a brine solution, a mixture of water and salt, sometimes enhanced with spices or herbs. This blend transforms your chicken breasts into true masterpieces of tenderness. The science behind this is simple: the salt in the brine partially breaks down the meat proteins, allowing for better absorption of water and flavors.

    In practical terms, this means your chicken breast will retain more moisture during cooking, even at high temperatures. The result: no more dry meat, just a juicy texture and a burst of flavor.

    How To Prepare A Perfect Brine For Your Chicken Breasts?

    Brining is accessible to everyone and requires just a few simple ingredients. Here are the steps for an effective brine:

    1. Prepare the base solution. Mix 1 liter of water with 60 grams of salt. You can use either fine salt or coarse salt. Make sure to dissolve the salt completely in the water.
    2. Add flavors. To enhance your chicken breasts, incorporate herbs like thyme, rosemary, garlic, or pepper. A few slices of lemon or a spoonful of honey can add a unique twist.
    3. Soak the breasts. Place your chicken breasts in a container, then cover them completely with brine. Cover the container with plastic wrap and let it rest in the refrigerator.
    4. Respect the soaking time. The ideal soaking time for chicken breasts ranges from 30 minutes to 2 hours. Avoid exceeding this time, as over-brining can make the meat too salty.
    5. Rinse and dry. Before cooking, rinse the breasts in cold water to remove excess salt, then dry them thoroughly with paper towels.

    What Cooking Method For Perfectly Juicy Chicken Breasts?

    After soaking in brine, the cooking method plays a crucial role. Chicken breasts are delicate, so it’s essential to choose a gentle and controlled cooking method.

    • In a skillet. Heat a skillet with a bit of olive oil or butter. Sear the breasts over medium heat for about 3 to 4 minutes on each side. To check for doneness, insert a meat thermometer: the internal temperature should reach 74 °C.
    • In the oven. Preheat your oven to 180 °C. Place the breasts on a baking sheet lined with parchment paper and bake for 15 to 20 minutes. Baste them regularly with their juices to keep them tender.
    • Steaming. For an even gentler cooking method, opt for steaming. This technique preserves the moisture and flavors of the chicken breasts.

    Our Tips To Enhance Your Chicken Breasts

    To take it a step further, here are some additional tips to elevate your chicken breasts after brining:

    • Use a marinade after brining: Once the breasts are rinsed, let them marinate in a mix of yogurt, spices, or lemon. This will add an extra layer of flavor.
    • Avoid overcooking: Chicken is a lean meat, meaning it can dry out quickly if left on heat too long. Extra vigilance is essential.
    • Let the meat rest: After cooking, allow the breasts to rest for a few minutes under a sheet of aluminum foil. This will help the juices redistribute evenly.

    Why Adopt Brining In Your Daily Cooking?

    Incorporating brining into your cooking routine means saying goodbye to bland and dry dishes. This method isn’t limited to chicken; it also works with other white meats like pork or turkey and even some fish.

    It also has the advantage of easily adapting to your preferences. You can experiment with herbs and spices to create unique flavors while ensuring perfect cooking. Brining is a simple, cost-effective, and accessible technique for everyone.

  • Make your room a sanctuary dedicated to rest

    Make your room a sanctuary dedicated to rest

    Considering the amount of time we spend sleeping over a lifetime, it is crucial to invest in high-quality bedding. This is something that certain brands specializing in mattress and bed frame design have fully grasped. While many French people have yet to recognize the role of their bedroom environment, we will explain why it is preferable for it to be a calm and comfortable space.

    Stretch out and put on your pajamas; it’s time for some well-deserved quality rest.

    The bed, the centerpiece for quality rest

    Make no mistake, before creating a restful environment in its entirety, it is essential to not skimp on the quality of the bedding. Currently, there are many manufacturers on the market. And since you may not be familiar with this field or an expert in it, navigating it can be challenging, making it difficult to choose the right equipment. One thing is certain; to find the mattress you need, it should provide ergonomic support and have thermoregulating properties to prevent overheating and night sweats.

    Depending on your body type, you should choose the density of the mattress. If you are on the heavier side, a firm mattress is advisable, whereas lighter individuals should opt for a softer mattress. Additionally, do not underestimate the importance of a good pillow. Consider a memory foam model and invest in a natural fiber duvet that also helps regulate temperature.

    The layout of your bedroom

    Beyond the quality of the bedding, particularly regarding the bed frame and mattress, it is vital to consider the room’s layout. This helps avoid visual clutter on one hand and also allows for better flow within the space. Ideally, the bed should be positioned as far as possible from the door and noise sources such as windows or radiators. Furniture should be low-profile to keep the horizon line clear.

    In practical terms, your brain receives the message that the space appears larger with an unobstructed horizon.

    Moreover, some studies highlight that nearly 80% of individuals sleeping in a well-organized room enjoy better quality rest. Naturally, it is advisable to minimize the presence of items like televisions or computers.

    The impact of colors in a bedroom

    This is no myth; you should remember that materials and colors influence your emotional state. This is especially true in the bedroom.

    To create a soothing ambiance that promotes restorative sleep, we recommend choosing colors from this palette:

    • beige;
    • light gray;
    • pastel blue.

    As for materials, consider solid wood, organic cotton, or linen. These are three pleasant and satisfying textures to the touch that foster relaxation. Lastly, it is wise to choose thick fabrics to shield you from light and outside noise.