Blog

  • Forget the fertilizer and coffee grounds: this ingredient boosts plants and gardens like never before

    Forget the fertilizer and coffee grounds: this ingredient boosts plants and gardens like never before

    Do you enjoy caring for your plants naturally, but find that tips like using eggshells or even the famous coffee grounds sometimes disappoint? What if we told you that a simple ingredient, likely already in your pantry, could make a difference and restore your plants to their full glory?

    Why your usual fertilizers might not be enough?

    You’ve probably tried various products to boost your plants. But honestly, are you satisfied with the long-term results?

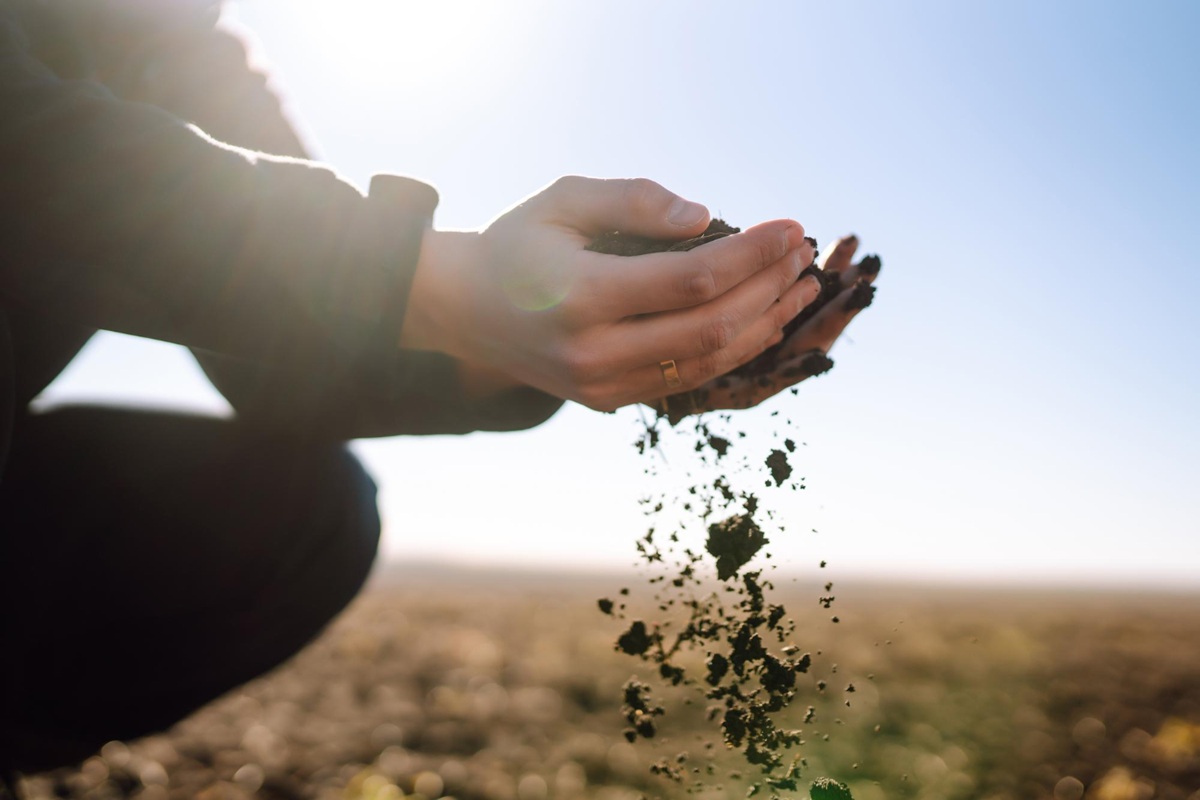
    Chemical fertilizers are indeed effective quickly, but they can weaken the soil and the plants themselves over time. With prolonged use, your soil may no longer provide the essential nutrients necessary for healthy plant growth.

    As for traditional natural solutions, such as crushed eggshells or coffee grounds, they take time to take effect. While their nutrients diffuse slowly, your plants may experience dangerously slowed growth.

    So, what can you do? What if the secret lies elsewhere, hidden right in your kitchen?

    The unexpected fertilizer hiding in your pantry: brewer’s yeast

    Yes, you read that right: it’s brewer’s yeast, a product commonly used in baking or cooking, that can work wonders in your garden. You may already know its benefits for skin or hair, but did you know it can be just as effective for your plants?

    Rich in B vitamins, amino acids, and essential minerals, brewer’s yeast nourishes both the plants and the soil deeply. It also stimulates the organic life naturally present in your soil, thus contributing to the overall health of your plants.

    Its popularity in organic farming is not new: gardening professionals have long used it to rejuvenate and protect crops naturally.

    What is the secret of brewer’s yeast for boosting your plants?

    But what exactly happens when you give brewer’s yeast to your plants? Here are a few key points about why it’s so effective:

    • It directly energizes plant growth through its supply of essential vitamins, resulting in denser and more vigorous foliage.
    • With its proteins and minerals, it quickly improves soil texture and fertility while stimulating microorganisms.
    • It enhances plants’ natural ability to fight against various pathogens such as bacteria and fungi.
    • Its nutrients facilitate the absorption of phosphorus and potassium, particularly promoting abundant flowering and successful fruiting.

    How to easily apply brewer’s yeast in the garden?

    Never used yeast in your garden before? Don’t worry, here are two simple and practical methods to get you started quickly:

    Watering solution to revitalize the soil and roots

    Very easy to prepare for effective deep nourishment of your plants:

    • Mix a tablespoon of brewer’s yeast in one liter of warm water.
    • Let it sit for a few hours to activate the microorganisms.
    • Slowly water the base of the plants every 2 to 3 weeks during their active growing period (mainly in spring and summer).

    Your vegetables, indoor flowers, and ornamental shrubs will have never looked better!

    Foliar spray for increased protection

    This second method will allow you to enhance and protect your foliage with ease:

    • Dilute a teaspoon of brewer’s yeast in a liter of warm water, along with a few drops of organic black soap to help the mixture adhere to the leaves.
    • Spray this preparation gently once a month directly on the leaves, preferably early in the morning or late in the day to avoid the hottest hours.

    Tomatoes, roses, and even your indoor plants will thank you!

    Which plants will be particularly grateful?

    All plants can benefit from this ingenious tip. However, some species will show remarkable vitality in response to this natural care:

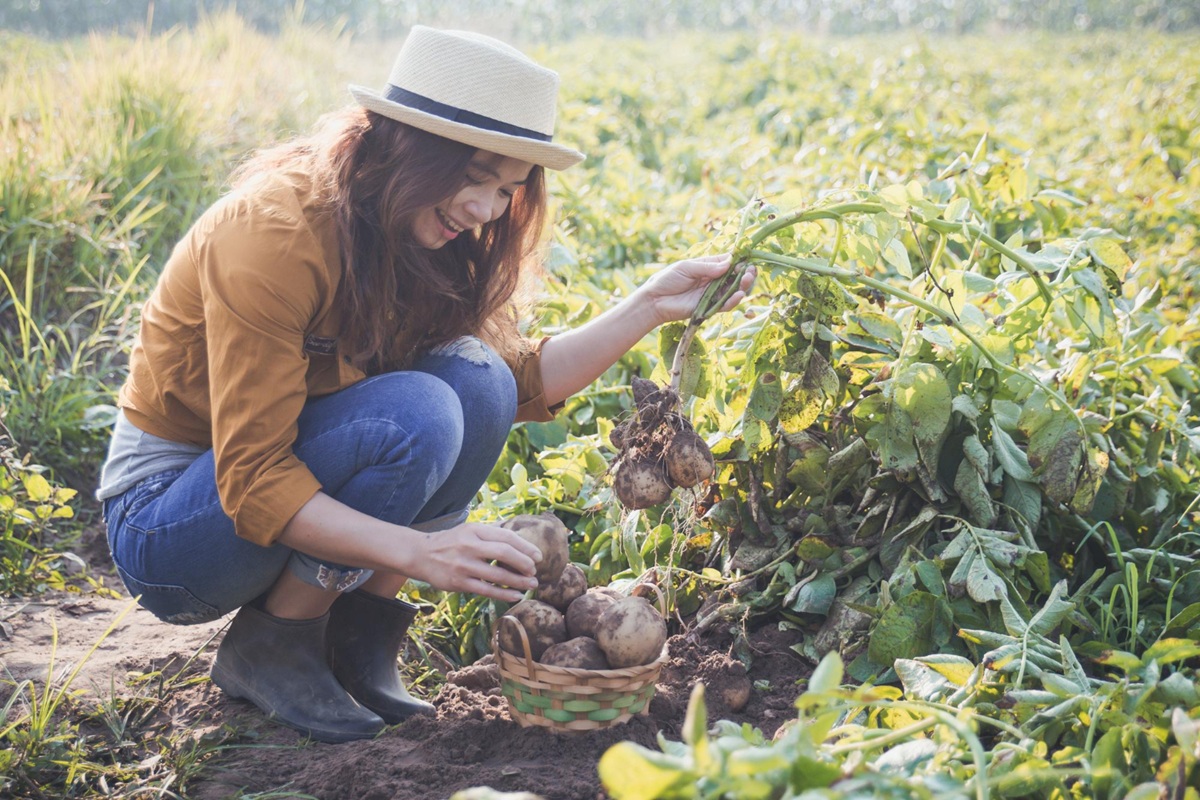
    • In the vegetable garden, expect your tomatoes, zucchinis, peppers, and salads to thrive.
    • In the ornamental garden, your roses, geraniums, and hydrangeas will enjoy generous and prolonged blooming.
    • Indoor plants will become more resistant to diseases and display denser, more vigorous foliage.
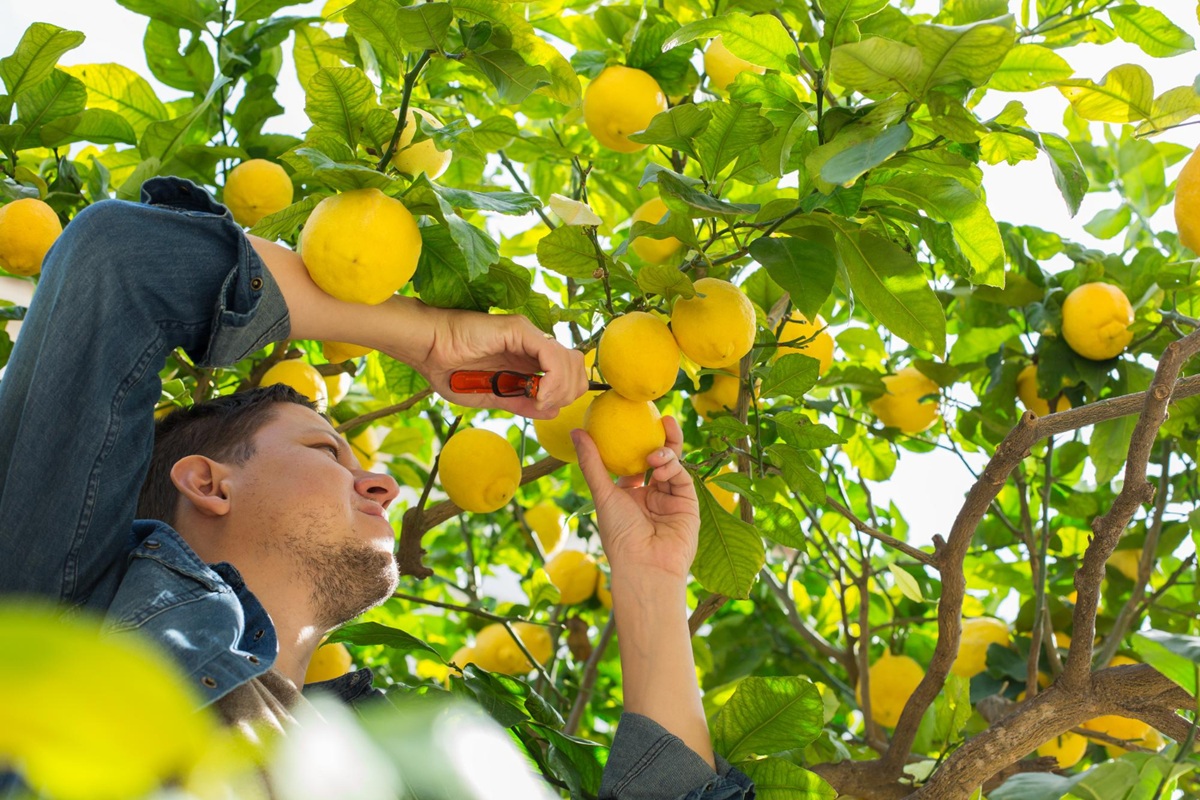
    • As for your fruit trees, yeast will significantly enhance their fruiting and resistance to common diseases.

    Easy to use, natural, and truly beneficial, brewer’s yeast deserves a place among your favorite gardening tips.


    Have you ever tried brewer’s yeast to stimulate your plants? What did you think? Please share your favorite natural methods for nurturing your plants. We’d love to hear your thoughts, so feel free to leave a comment!

  • Yes, you can still plant potatoes and here’s how to ensure your crop is successful

    Yes, you can still plant potatoes and here’s how to ensure your crop is successful

    Growing potatoes in your own garden is a dream come true for many amateur gardeners! However, you might have some questions regarding the best planting time, soil preparation, or the necessary care to ensure a bountiful and healthy harvest.

    Don’t worry, we’re here to provide a detailed, step-by-step guide to assist you on this gardening adventure.

    When to Get Potato Plants?

    Seed potatoes, those small certified tubers that are healthy and disease-free, start appearing in specialty shops by mid-December. If you want a wide selection, it’s best to purchase your plants at the beginning of the year.

    These precious plants can wait for a few weeks in a cool, dark place. A handy tip to check if your plants are ready? The shoots should ideally reach 1 to 2 cm.

    If they aren’t ready yet, don’t stress: a few weeks in the light will help them sprout properly.

    What Is the Ideal Period to Plant Your Potatoes?

    Generally, potato planting occurs when the soil reaches at least 10°C, which signifies it has warmed up in spring. For most regions, April is the ideal month. If you are in an area where nighttime frost is still a concern, it’s better to wait until the end of April to avoid cold damage.

    Is your climate rather cold, mountainous, or late? Plant in early May or consider planting under cover (in a tunnel or hotbed).

    On the other hand, if you enjoy a mild climate, you can start as early as March, or even February in certain coastal or southern areas. However, be cautious: these early plantings require much more attention and experience!

    Preparing the Soil Before Planting

    It cannot be emphasized enough: the success of your potatoes begins with good soil preparation a few days or weeks beforehand.

    Use a broadfork or garden fork to aerate and loosen the soil well. The secret to good soil? Wait until the soil has dried out a bit, meaning it should be moist but not waterlogged: overly saturated soil is hard to work and creates a poor structure for your harvest.

    While turning the soil, try to maintain the natural order of soil layers by keeping the humus on the surface. This way, you’ll help preserve the richness of underground life.

    How to Fertilize Your Crop Naturally?

    The potato is quite a hungry plant. To maximize your yield, adding natural fertilizers is highly recommended. You can simply scratch these elements into the soil:

    • Wood ash adds potassium and reduces acidity. Be careful, a handful per square meter is more than enough and is not suitable for already alkaline soils.
    • Compost or well-rotted manure, preferably straw-based or in granules, is great, but follow the recommended quantities on the packaging.

    Techniques for Properly Planting Your Potatoes

    • Before planting, anticipate the essential hilling: form small mounds along each row. For spacing, allow 65 cm between rows and 35 cm between early varieties. For late varieties, aim for 70 cm between each row and at least 40 cm between the plants.
    • To make planting easier, feel free to stretch a string between two stakes or use row markers.
    • During the actual planting, dig holes 10 cm deep, place the plant with the sprout facing up or to the side, then cover with 5 to 10 cm of soil. A deeper planting is preferable in areas prone to late frosts.

    Good Practices Throughout the Growth Until Harvest

    Hilling Is Essential to Protect the Yield

    Hilling involves regularly covering the young shoots emerging from the soil with earth. This prevents the tubers from turning green and protects them from potential late frosts. Two hillings spaced 2 to 3 weeks apart should suffice.

    Regular and Moderate Watering

    During hot or dry periods, make sure to adequately water your plants. This regular watering can sometimes double your final yield!

    Topping Is a Useful Step

    Depending on your variety (generally count 70 to 120 days of growth), cut the tops three weeks before harvest. This action enhances the flavor and limits late-season blight development.

    Harvesting and Storing Your Potatoes Easily

    Harvesting your potatoes is a true joy in the garden: grab a garden fork and gently lift each plant. Depending on the varieties and conditions, each plant yields between 500 grams and 2 kg of potatoes.

    Consume your early varieties quickly, kept cool, to enjoy their tender flesh. For long-storage varieties, allow your potatoes to dry, then store them in a cool, dark, and ventilated place, like a cellar. Check on them regularly and remove any sprouts during winter.


    Have you grown your own potatoes at home? What tricks work best for you? Please leave a comment below. Your experience interests us and could help other readers! It’s your turn to share!

  • Eliminate the ants from your house once and for all with this radical solution

    Eliminate the ants from your house once and for all with this radical solution

    Every spring, the same situation arises: ants invade our homes, attracted by food and cozy shelters. While a few scouts may seem harmless, it’s crucial not to underestimate their ability to turn your space into a full-fledged hunting ground. Fortunately, there are several methods, both natural and more radical, to get rid of them for good, and some of these methods remain relatively unknown to the general public.

    Understanding Ant Behavior: The Key to Effective Elimination

    Before taking action, it’s essential to understand how ants operate. Their strength lies in their organization: they communicate using pheromones, enabling them to quickly locate food sources. If a lone scout discovers some crumbs, it’s likely that an entire army will follow.

    To eradicate ants effectively, you need to cut off their food access, erase their chemical trails, and eliminate their colony. A comprehensive approach is necessary to prevent reinfestation.

    Natural Solution: White Vinegar and Baking Soda

    Let’s start with the gentlest method. White vinegar is the nemesis of ants: it erases the pheromones they use for navigation. Spraying pure vinegar on entry points and along their routes is an excellent first step.

    You can also add baking soda, which acts as a natural poison. When mixed with powdered sugar (in equal parts), it attracts the ants and kills them upon ingestion. Remember to repeat this process regularly to effectively tackle the entire colony.

    This solution is perfect for early infestations but may show limits with larger ones.

    Diatomaceous Earth: A Powerful Yet Natural Weapon

    For a more advanced solution that won’t compromise your health or that of your pets, diatomaceous earth is an excellent choice. This natural powder directly attacks the ant’s exoskeleton, causing rapid dehydration and death.

    Simply sprinkle diatomaceous earth lightly in strategic areas: cracks, baseboards, and window frames. Make sure the powder remains dry for maximum effectiveness. A thin layer is sufficient; there’s no need to spread large amounts.

    Patience and consistency will yield visible results in just a few days.

    Industrial Baits: The Solution to Eradicate the Colony at Its Source

    When natural methods are not enough, it may be necessary to turn to ant baits available in stores. These products, available as gels or bait stations, contain insecticides specifically designed not to kill the ant immediately. This allows the ant to bring the poison back to the queen, ensuring the complete elimination of the colony.

    Baits should be placed where ants are active. It’s crucial to not kill the first visible ants, as they are the ones that will transport the bait back to the nest.

    Nest Treatment: The Final Step for Total Eradication

    For a permanent solution, it is crucial to locate and directly treat the nests. Ants often establish their colonies in damp or sheltered areas, such as under decks, in cracked walls, behind baseboards, or appliances.

    Once located, the nest can be treated:

    • By pouring boiling water mixed with vinegar over it;
    • By using specific insecticide powders;
    • By calling in a pest control professional, if necessary.

    Directly treating the colony is often the only way to prevent a resurgence of ants.

    Preventing for Better Recovery: Daily Habits to Adopt

    Even after eradicating the ants, prevention remains key to avoiding reinfestation. Adopting a few simple daily habits can help keep your interior safe:

    • Regularly clean kitchen surfaces and avoid leaving crumbs behind;
    • Store food in airtight containers;
    • Check and seal cracks, gaps, and possible passages around windows and doors;
    • Maintain outdoor areas by removing wood piles, dead leaves, and other potential shelters near foundations.

    A clean and securely protected interior will naturally be less attractive to these little intruders.

    Multiple Methods for the Same Goal

    In the face of an ant invasion, various solutions are available. From simple white vinegar to more radical treatments like diatomaceous earth or industrial baits, your approach will depend on the severity of the situation. Taking swift and comprehensive action is key to restoring a peaceful home free from these unwelcome guests.

  • Tired of flies in the house? Place this cut fruit on a plate and watch the magic

    Tired of flies in the house? Place this cut fruit on a plate and watch the magic

    As the beautiful days return, it’s hard to escape the flies that invade the house. These unwanted insects, besides being annoying, can carry germs and contaminate our food. However, there’s a simple, natural, and surprisingly effective solution that doesn’t require chemical products: just use a cut fruit placed on a plate. Curious to know which one and how to do it? Here are all the answers.

    Why Do Flies Invade Our Homes?

    Before discovering the solution, it’s essential to understand why flies seem to love our houses. Their attraction is mainly driven by the search for food, warmth, and humidity. Food scraps, ripe fruit bowls, damp sinks, and poorly sealed garbage bags are all elements that attract these little invaders.

    In our kitchens, flies find an ideal environment to reproduce and proliferate. A simple oversight can trigger a full-blown invasion. Thus, it’s important to counter them with natural yet effective techniques.

    The Magic Fruit Against Flies: A Simple and Effective Weapon

    Among the various natural tips, using a cut lemon stands out as a particularly effective solution. More specifically, by combining this fruit with a simple ingredient that everyone has at home – cloves – the result is impressive.

    The principle is simple: cut a lemon in half and insert several cloves into it. Then, place the halves on a small plate, and leave it in strategic areas: near windows, in the kitchen, next to the fruit bowl, or on the coffee table.

    Why Does This Trick Work So Well?

    The success of this method lies in the olfactory sensitivity of flies. These insects use their sense of smell to find food but also to navigate their environment. When the air is saturated with the citrusy and spicy scent emanating from the plate, it creates a sensory barrier that disorients them and drives them away.

    Additionally, lemon and cloves have natural antimicrobial properties. This not only repels flies but also slightly purifies the ambient air, limiting the proliferation of bacteria.

    How to Optimize This Method For Maximum Effectiveness?

    To ensure the effect lasts several days, remember to renew your plate every two to three days. As the lemon dries out, its scent diminishes, reducing its repellent power. You can also vary the locations to better cover all rooms and target the areas most frequented by flies.

    If you want to further enhance the effectiveness of your setup, feel free to multiply the plates in different rooms or combine this tip with other natural methods, like dried lavender sachets or basil plants, which are also disliked by flies.

    Can Other Fruits Be Effective?

    Lemon remains the most effective due to its acidity and fragrance, but other fruits can also be used successfully, especially oranges or grapefruits. Their usage is the same: cut in half and sprinkled with cloves. However, since their scent is slightly sweeter, their effectiveness may vary depending on the types of flies present.

    It’s advisable to experiment to find the combination that best suits your environment.

    Precautions to Take to Avoid Flies Long-Term

    Of course, this cut fruit trick works perfectly, but it’s important to pair it with some good habits for lasting results. Avoid leaving food uncovered, regularly empty your trash, and clean your countertops thoroughly.

    Also, consider ensuring good ventilation in your home and, if possible, installing screens on windows to limit intrusions.

    By combining rigorous hygiene and natural tips like the lemon and cloves trick, you can achieve a fly-free home without resorting to harmful chemical insecticides that could jeopardize your health and that of your loved ones.

  • Solar panel cleaning: the express method to make them spotless in just 30 minutes

    Solar panel cleaning: the express method to make them spotless in just 30 minutes

    Congratulations on taking the leap and installing your photovoltaic solar panels! You’re making a significant contribution to both your wallet and the planet. But did you know that regular maintenance is essential to keep their performance at its best?

    Yes, even your panels need a little care each year to stay in top shape. The good news is that it only takes 30 minutes a year. So how do you do it? We’ll explain everything step by step.

    Clean your solar panels in 3 easy steps

    You probably want to avoid unnecessary risks by climbing up onto your roof. So how can you effectively clean your panels from the ground? Here’s a simple and quick method that will take you about half an hour:

    • Get a telescopic brush suitable for high cleaning. This handy tool allows you to work safely from the ground.
    • Attach a soft cloth soaked in demineralized water to your brush. This precaution prevents limescale marks on the panels.
    • Gently wipe each panel, cleaning carefully to avoid going over a cleaned area with a dirty cloth. Remember to regularly rinse your cloth in a bucket of clear water.

    With these three simple steps, your panels will quickly regain their full capabilities.

    When is the best time to clean your solar panels?

    The timing of your panel cleaning can really make a difference. Have you considered avoiding peak sunny hours?

    If you haven’t yet, remember this: prefer cleaning in the morning or early evening. By doing so, you’ll prevent unsightly streaks caused by rapid drying.

    Mistakes to avoid when cleaning

    Some practices should be entirely avoided, as they can irreparably damage your solar panels:

    • Forget about pressure washers. While these devices may seem convenient, the water’s power can easily crack the glass of your panels and cause expensive damage.
    • Also, avoid using hard tap water. It can leave white deposits that severely reduce the panels’ performance. Installing a water softener can be a wise investment to protect your solar equipment in the long run.

    These essential precautions will allow you to sustainably maintain your photovoltaic equipment without taking unnecessary risks.

    Why is it important to regularly clean your solar panels?

    Is it really necessary to clean your panels every year? Absolutely! Like any surface permanently exposed to the outdoors (windows, cars, roofs…), solar panels quickly accumulate dust, fallen leaves, and pollen. This phenomenon leads to a notable drop in their performance.

    In cases of significant dirt buildup, output losses can reach up to 10%. Just think about it: you’ve carefully sized your equipment to maximize savings, so why lose part of that potential due to a simple layer of dirt?

    Minimal but regular maintenance ensures optimal energy production throughout the year.

    How often should you clean your solar panels?

    The frequency of cleaning primarily depends on your environment:

    • If your home is near the coast or close to agricultural fields, consider cleaning quarterly due to frequent deposits of dust or sea salt.
    • In an urban or rural setting without significant pollution or dust sources, cleaning once or twice a year is sufficient. Spring and autumn are ideal for these tasks.

    Tip: If you notice an unexplained drop in your solar production, always start by checking the cleanliness of the panels. You might just need a good dusting to restore your usual level of production.

    Is it wise to hire a professional?

    If your solar panels are not easily accessible from the ground, don’t hesitate to delegate this task. Climbing onto the roof or walking on your solar panels poses real dangers both for you and your installation.

    If in doubt or unable to clean your panels without taking risks, consider hiring a specialized professional. In addition to cleaning, they can perform a quick check to detect any signs of deterioration before the issue becomes serious.


    Have you ever tried cleaning your photovoltaic panels yourself? Do you have any specific tips to share with our community? Has your output noticeably increased after cleaning? We’re eager to read your experiences in the comments below!

  • 4 ultra-simple tips to quickly clean your range hood

    4 ultra-simple tips to quickly clean your range hood

    Is your range hood covered in grease? Don’t worry! A good cleaning can quickly and easily restore its effectiveness. Discover how to give it a fresh look in just a few steps, without any hassle.

    Why clean your range hood regularly?

    Have you ever wondered what the filters in your range hood are for? They trap smoke, odors, and especially the pesky grease from your cooking activities. Without regular cleaning, these greases accumulate, hinder the appliance’s efficiency, and even increase the risk of overheating.

    For typical kitchen use, plan to clean it about once every two months. Are you a fan of frying or cooking very fatty dishes? In that case, consider more frequent maintenance.

    By keeping your range hood clean regularly, you not only maintain a spotless kitchen but also prolong the life of your appliance.

    Prepare your range hood before cleaning

    Before you start cleaning your range hood, a few precautions are essential. First, turn off the power or unplug the appliance to avoid accidents. Did you just cook? Allow your range hood to cool down completely before handling it.

    A handy tip to remember: protect your cooktop by covering it with newspaper or plastic wrap. This will help prevent splashes on your countertops or burners.

    1. Clean the range hood grill effectively

    The grill is the essential part of the range hood, as it captures most of the grease. To clean it properly, follow these easy steps:

    • Gently remove it from its housing, following the manufacturer’s instructions (refer to the manual if needed).
    • Soak it in a large basin filled with soapy hot water for 15 to 30 minutes.
    • If any residue remains, sprinkle some baking soda on it and gently scrub with a brush or sponge. Rinse thoroughly with clear water and dry with a clean cloth.

    Once your grill is cleaned, simply put it back in place.

    2. Take care of the outside of your range hood

    For the outside of your range hood, avoid abrasive sponges: they could damage the surfaces, especially stainless steel or glass.

    Instead, use a soft cloth lightly dampened with warm white vinegar or a mixture of water and dish soap. Gently wipe it down and finish by buffing with a microfiber cloth. This will restore your range hood’s shine.

    Is your hood made of glass? Glass cleaner remains an effective choice. For stainless steel appliances that often show fingerprints and smudges, try the olive oil trick: wipe with a soft cloth for a spotless finish in no time.

    3. How to clean filters deeply?

    Your filters also accumulate a lot of grease. Here’s how to ensure effective cleaning with just a few simple steps:

    • Soak them for an hour in hot water mixed with baking soda and black soap.
    • Use a soft brush to remove impurities, then rinse thoroughly.
    • If you’re short on time, a generous spray of white vinegar followed by a regular cycle in the dishwasher works wonders.

    After cleaning, be sure to let your filters dry completely before putting them back in place.

    4. Get rid of stains on stainless steel easily

    Stainless steel brings a modern touch to your kitchen but tends to be marked by fingerprints and various splashes. To tackle this, you have two effective options:

    • Use a cloth soaked with a drop of olive oil, which is practical and economical.
    • Utilize a cleaner specifically designed for stainless steel: an effective solution that also offers lasting protection from new stains.

    Your stainless steel hood will thus always look pristine, just like new! With these simple and practical steps, your range hood will remain efficient, aesthetically pleasing, and perfectly clean.


    Have you tried our tips? Let us know your thoughts in the comments! What are your favorite techniques for keeping your range hood clean? Do you have any other tips to share with our readers? Feel free to join the conversation by leaving your comment below!

  • Done with the dry cleaning: the genius trick to wash a XXL duvet at home effortlessly

    Done with the dry cleaning: the genius trick to wash a XXL duvet at home effortlessly

    When it comes time to care for your bedding, you may find yourself facing a major challenge: your comforter simply doesn’t fit in your washing machine. Too bulky, too thick, it refuses to bend to your efforts. In light of this, many consider the quick but costly solution of dry cleaning.

    However, there is a straightforward method to wash your comforter at home, without spending a fortune or sacrificing your comfort.

    You will see that with a little organization and some well-chosen steps, it is quite possible to have a fresh, clean, and inviting comforter without stepping foot in a laundromat.

    Preparing Your Comforter Before Washing

    Before thinking of giving your comforter a bubbly bath, it’s essential to take a few minutes to prepare it properly. Start by airing it out by vigorously shaking it outside. This helps remove a significant amount of dust as well as the invisible dust mites that may be lurking within.

    If possible, vacuum the entire surface with a brush suitable for fabrics. This preliminary action considerably lightens the washing workload and optimizes the soaking process you will do later.

    Don’t hesitate to check the labels on your comforter. Some materials, like down or natural fibers, require special care, particularly regarding water temperature.

    Hand Washing: Your Best Ally

    When your machine lacks capacity, your bathtub becomes your best ally. Fill it generously with lukewarm water—avoid using very hot water, as it could damage the filling—and add a mild detergent, ideally formulated for delicate fabrics.

    Submerge your comforter completely in the water, making sure to distribute it evenly so it absorbs moisture uniformly. Allow it to soak for a good hour, letting the ingrained dirt gently loosen from the fibers.

    During this phase, gently press the comforter underwater with your hands to circulate the detergent and ensure a thorough cleaning. Focus delicately on the most exposed areas, such as the edges or center, which often show more wear from usage.

    Rinsing for Impeccable Results

    After this long soak, comes the equally crucial moment of rinsing. Completely empty the bathtub and rinse the comforter with clear water. It’s essential to repeat this operation several times, as soap residues could compromise the fabric’s quality and cause skin irritation during use.

    To facilitate rinsing, you can let a thin stream of water flow while gently pressing the comforter against the side. Patience is your best ally here; a rushed rinse will undo all your efforts.

    As for the spinning process, do it gently. Resist the urge to twist your comforter harshly. Opt for the gentle method: press it against the wall to let the water flow out without damaging the fibers or distorting the filling.

    Drying: A Key Step to Avoid Surprises

    Drying is undoubtedly the most crucial step to ensure the longevity of your comforter. Ideally, lay it flat on a large drying rack or sturdy line in a well-ventilated outdoor space. The sun is your best ally for quick and natural drying and has the added benefit of sanitizing the fabric due to its antibacterial properties.

    If the weather doesn’t cooperate, place your comforter in a well-ventilated room, remembering to turn it regularly to avoid moisture stagnation inside.

    No Bathtub Available? Here’s An Alternative Solution

    Lacking a bathtub doesn’t mean you can’t wash your comforter effectively. Several simple solutions are available.

    The first option is to use a large basin or shower tray. Choose a container as wide as possible: a large gardening basin, a clean storage bin, or even a spacious walk-in shower can work perfectly. Fill the container with lukewarm water and mild detergent, then submerge your comforter as you would in a bathtub. The key is to thoroughly saturate all the fibers with soapy water, even if you have to do it in several stages or wash the comforter by sections.

    If you have access to an outdoor space, . Lay your comforter flat on a clean tarp or directly on well-cleaned tiles. Soak the comforter thoroughly with a garden hose, apply the detergent, and gently scrub with a soft brush, paying extra attention to the dirtiest parts. Rinse thoroughly until the water running off is perfectly clear.

    In both cases, you’ll need to be a bit more patient with rinsing and spinning. Always press your comforter gently to remove excess water without risking damage to the fibers or crushing the filling.

    Finally, the drying recommendations remain the same: lay your comforter in a well-ventilated area, ideally outdoors, and turn it regularly for even drying.

    Caring for Your Comforter to Space Out Washes

    Good daily care is essential to avoid having to wash your comforter too frequently. Using a protective cover is a simple yet extremely effective gesture. It traps dust and sweat marks, thus prolonging your comforter’s freshness.

    Also, remember to air it out frequently by exposing it to fresh air. Even just placing it in front of an open window for a few hours can work wonders.

    If you are prone to allergies or have pets, it is recommended to wash your comforter more often, without necessarily waiting for odors or visible stains to appear.

    Even without access to a large-capacity machine, you can very well wash your oversized comforter at home. By following these simple steps, you will restore freshness and comfort to your bedding while making significant savings. No need to schedule a trip to the dry cleaners: your bathtub and a little patience are more than enough.

  • Will your lemon tree produce lemons this year? The signs that don’t lie

    Will your lemon tree produce lemons this year? The signs that don’t lie

    Have you decided to plant a lemon tree in your home and are already dreaming of harvesting delicious homegrown fruits? Good news! With a little practical knowledge, you can easily anticipate whether your lemon tree will be fruitful this year.

    Follow our advice to clearly identify the signs of a bountiful harvest and apply the right techniques to provide your tree with an optimal environment.

    What age is your lemon tree? The first step toward fruiting

    Did you know? Your lemon tree must be between 3 and 5 years old to start producing its first fruits. Of course, the fruiting age may vary slightly depending on the variety and the environment in which your tree is growing.

    A young tree, by nature, will be less fruitful, while an older lemon tree might see its performance decline.

    Keep this age indication in mind, and be observant. Patience plays a crucial role in citrus cultivation.

    Does your lemon tree have good climate conditions?

    Your lemon tree loves mild weather. It is particularly sensitive to extreme conditions such as:

    • Low temperatures that stifle its growth and hinder fruiting.
    • Strong winds that damage foliage and flowers.
    • Prolonged and heavy rainfall that saturates the soil and affects its roots.

    To protect your lemon tree from bad weather, choose a sheltered location. Look for a spot away from prevailing winds and regularly check the soil quality after heavy rains. This way, your tree will increase its chances of producing a bountiful harvest.

    Soil and watering: the winning duo

    Your lemon tree is particularly sensitive to the type of soil it is planted in and to the quality of the water you use. Here’s how to meet these two critical requirements:

    • Opt for light, airy soil that is ideally enriched with essential nutrients. Lemon trees dislike heavy soils or those that retain excess water.
    • Prefer untreated water free from chemicals or heavy metals that could harm your tree.

    Regularly check the state of the soil around your lemon tree. This will ensure an ideal balance for fruits to develop properly.

    Easily recognizing signs that your lemon tree is fruiting

    Blooming: welcome to the first flowers!

    Is your lemon tree starting to show off its lovely white flowers with a delicate fragrance? Congratulations, that’s a great sign! Flowers typically appear between spring and early summer.

    During this period, be sure to maintain stable temperatures and moderate humidity to encourage the transformation of flowers into fruits.

    Your first lemons are appearing: key moment to observe

    A few weeks after this promising bloom, you will notice your first small lemons forming gradually.

    This pivotal moment requires special attention in terms of regular watering (without excess) and suitable nutritional follow-up to promote their steady growth.

    Visual health signs that indicate everything is fine

    Pay attention to these simple but valuable visual cues that ensure your lemon tree is healthy:

    • Leaves that are a vibrant, shiny green indicate that everything is perfectly fine.
    • On the contrary, watch out for yellowing, browning, or wilting leaves, which usually signal an issue (over or under-watering, deficiencies, diseases).
    • Your lemons will gradually transition from green to light yellow or yellow-green. This color change indicates that it’s time to harvest the long-awaited fruits!

    This regular monitoring will help you act promptly and fully enjoy the generosity of nature.


    Do you already have a lemon tree at home? What results are you getting so far? Come and share your experience in the comments below! Your feedback could assist other amateur gardeners in achieving a great harvest. We eagerly await your testimonials and practical tips!

  • Do you have a pellet stove? Here are the 5 mistakes to avoid at all costs in the spring

    Do you have a pellet stove? Here are the 5 mistakes to avoid at all costs in the spring

    The beautiful days are back, temperatures are warming up, and your pellet stove is peacefully hibernating. But be careful, are you certain you are providing the necessary care to ensure it survives comfortably through its summer dormancy?

    It would be a shame to find your faithful heater out of order when the first chills arrive. Discover right away the common mistakes you absolutely need to avoid to keep your stove in good condition until autumn.

    1. Be careful not to run out of wood pellets

    Remember, during the winter of 2022/2023, the shortage of pellets caused many issues. Many of you faced high prices and concerning delivery delays. Why not avoid this mishap this year?

    Order your pellets now; you will benefit from better prices and shorter delivery times. Storing your pellets in the spring may seem complicated, but don’t worry—simple and effective solutions exist to preserve their quality for several months.

    2. A full pellet reservoir: a classic mistake to avoid

    It is easy to forget to empty the reservoir after the last fire of winter. However, leaving wood pellets in your stove for several weeks without use poses a real threat to your equipment.

    Wood is naturally sensitive to moisture. Pellets left in the reservoir can swell and cause severe clogging of your device. The result: when the first cold strikes, your heater won’t work.

    To avoid this unpleasant surprise, take a few minutes at the end of the season to completely empty the reservoir.

    3. Neglecting thorough cleaning: a risky bet

    You may think that you can always clean your stove before the next cold season. Big mistake! Taking care of your heating appliance means conducting a thorough cleaning of the pellet stove as soon as you are sure you won’t use it anymore.

    A complete intervention includes:

    • Completely cleaning the pellet reservoir
    • Emptying and meticulously cleaning the ash drawer
    • Careful cleaning of the glass and internal metal parts
    • Thorough inspection of the flue gas ducts

    Your stove will thank you by igniting immediately when the cold returns.

    4. Postponing sweeping: a reckless decision

    Did you know that sweeping is an annual legal obligation? If you do not regularly sweep your pellet stove, you expose yourself to fire risks and poor combustion. And there’s no need to wait until autumn to schedule this task.

    Chimney sweep specialists are much less busy in spring. This is the perfect time to call them. You will often benefit from promotional rates, and you can obtain your valuable certificate with peace of mind.

    In addition, you can always perform a quick self-sweeping to remove any last traces of soot that may be obstructing your flue.

    5. Forgetting annual maintenance by a professional

    Just like with sweeping, annual professional maintenance should not be delayed too late in the year. Pellet heating professionals work year-round, but their schedules are much more flexible after the winter season.

    Why wait? By scheduling this appointment now, you get ahead and ensure peace of mind and savings for the upcoming season. Don’t forget that intervention prices can vary depending on the season. Spring maintenance often proves to be more budget-friendly.


    How about you? Do you always get your stove serviced in spring or do you wait until autumn? Share your experiences with us in the comments! Perhaps you have other relevant tips to share? We genuinely want to hear your thoughts, so don’t hesitate to write to us below!

  • Are you not sleeping well? A simple handful of this ingredient under your bed can change everything

    Are you not sleeping well? A simple handful of this ingredient under your bed can change everything

    Salt has been used for thousands of years not only in cooking but also in purification rituals, body care, and the protection of living spaces. This practice, once considered mere superstition, is now gaining attention in a more pragmatic and caring perspective. Placing salt under your bed could prove to be an surprisingly effective method to combat everyday inconveniences such as humidity, sleep disturbances, or unseen tensions.

    A Natural Shield Against Humidity

    In certain bedrooms, especially those poorly ventilated or facing north, humidity can become a real problem. It promotes the growth of mold, degrades air quality, and can even affect sleep quality. Remarkably, salt is hygroscopic, meaning it attracts and absorbs moisture from the air.

    Thus, placing coarse salt under your bed could capture excess ambient moisture without resorting to costly devices, resulting in a healthier atmosphere, fresher and drier sheets, and improved breathing during the night.

    Purifying the Energetic Atmosphere of the Room

    Beyond its physical properties, salt is regarded as a powerful energetic purifier. Many traditions, from Asia to South America, have used it to ward off negative influences, dispel malevolent spirits, or simply create inner harmony.

    While avoiding mysticism, it’s interesting to note that many individuals report experiencing easier sleep, deeper rest, and a sense of lightness upon waking after placing salt under their beds. Whether this effect is placebo or has a genuine impact on the subtle ambiance of the room is less important if it works and poses no risk.

    How to Adopt This Ritual at Home?

    To implement this tip effectively, consider the following recommendations:

    • Opt for Natural Coarse Salt: Choose untreated varieties like sea salt or Himalayan pink salt. Refined salt contains additives that reduce its effectiveness.
    • Place Salt in an Open Container: Use a bowl, saucer, or jar without a lid, preferably made of natural materials like glass or ceramic.
    • Position the Container Under Your Bed: Ideally, place it in the center or in the corners. Some people choose to use multiple bowls for comprehensive coverage.
    • Replace the Salt Fortnightly: Change the salt every two weeks or more frequently if it becomes wet or compacted. When this happens, it is considered “saturated” and loses its properties.

    A Domino Effect on Your Overall Well-Being

    Better sleep leads to better living. Sleep is a pillar of our mental, emotional, and physical health. By indirectly improving sleep quality, salt contributes to better stress regulation, more effective recovery, and enhanced mood stability.

    Moreover, by partially eliminating nighttime disruptions like humidity or heavy energy, we allow our bodies to regenerate more effectively. Some users also report fewer nightmares, a gentler ambiance in their room, and improved focus in the morning.

    An Ecological, Economic, and Safe Solution

    In a world often seeking high-tech solutions to everyday problems, this tip serves as a reminder that sometimes it’s possible to return to basics. No need for electronic devices, chemical sprays, or costly renovations. A simple bowl of salt can transform a room into a peaceful haven.

    Moreover, unlike essential oil diffusers or industrial air fresheners, salt is completely neutral—no fragrance, no allergens, no electricity. It acts quietly, in the shadows of our bed, to foster a healthier environment.

    Caution: Don’t Expect Miracles

    It’s important to remain realistic. Salt does not replace good sleep hygiene, quality bedding, or a well-ventilated room. It is not a magic wand but a simple addition to an overall well-being approach.

    The goal isn’t to blindly believe in an esoteric ritual but to experiment for oneself, consciously and curiously. After all, it costs almost nothing to try!